
- Help Center
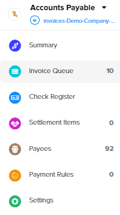
- Accounts Payable
- Invoice Queue
-
Docyt Setup, Personal & Business Settings
-
Navigation & Getting Started
-
Top FAQs from Business Owners
-
Docyt Mobile App
-
Accounts Payable
- Setup
- Managing and Processing Invoices
- The UPS Store®
- Document Management
- Vendor Credits
- Accounts Payable Approval Settings
- Bill Pay
- Docyt ACH
- Split Expenses
- Intercompany Settlement
- Vendors & Payees
- W-9 & 1099
- Invoice Queue
- Mark As Paid
- Payment Rules
- Receipt Box
- Copy Invoice Link
- Billable Invoice
- Merge Duplicate Vendors
- Docyt Check
- Split Invoice in Multiple Payments
- Split Invoice In Multiple Businesses
- Split Invoices
- Vendor Tax Profile
- QBO Sync Status for Invoice
- Docyt ACH Timeline
-
Flagged Transactions & Document Requests
-
Financial Connections
-
Expense Reports & Employee Reimbursement
-
Receipt Management
-
Business Reports & Budgets
-
Vendors, Payees, W-9 & 1099
-
Revenue Integration & Reconciliation
-
Reconciliation Center
-
Accounts Receivable
-
Business Mailroom
-
Accountant
-
Product Updates
-
Docyt University
-
Ledger Reports
-
Revenue Centre
-
Integration
-
Docyt Plans
-
Docyt Check
-
Expense Management
-
Connect Quickbooks
-
Docyt Copilot
-
Business KPI-Mobile
-
Settings
- Billing Information
- Business Settings
- Business Employees
- Business Reports & Metrics Settings
- User Roles in Banking Accounts
- Permission in Revenue Centre
- Permissions in Reconciliation center
- Permissions in Business Mailroom
- Permission in Vendor Module
- Permissions levels of flagged transactions
- Document Requests Permissions
-
Dashboard
-
Reports
-
Banking & Reconciliation
-
Docyt Modules
How to Modify an Invoice After Payment via Docyt Check has Been Made?
To modify an invoice after payment via Docyt check has already been made, follow these steps:
2.) Click on the invoice, then click on the check document link at the bottom of the right panel.

3.) Download the check.

4.) Exit the invoice detail screen to go back into the Paid invoice area.
Click the Amount button on the right side of the invoice, and select 'Cancel Payment.'

5.) Click Confirm to cancel the payment. This moves the invoice back into the Invoice Queue.

6.) Locate the invoice in Invoice Queue. Click the amount button and select 'Edit Invoice.' 
7.) Click Proceed to make changes to the invoice details.

8.) Here you can edit the invoice details.
When done, be sure to click Verify and save the changes. Once Verified and Approved, the invoice moves back into the 'Ready to Pay' state in the Invoice Queue.

9.) Once the invoice is ready to pay, click the amount button, select 'Mark as Paid' and then choose the option for 'Manual Check.'
10.) Enter the details from the Docyt Check document you downloaded in Step #3 and click 'Mark as Paid.' This moves the invoice back into the 'Paid' invoice area.

11.) Navigate back into the 'Paid' area to locate the invoice, then click on the invoice to view details. At the bottom of the right panel, click on the check document link.

12.) Upload the Docyt Check document you downloaded in Step #3. The check has now been reattached to the updated invoice.

13.) After a few moments, click 'View in Quickbooks' (upper right corner) to confirm a successful sync.
