
- Help Center
- Accounts Payable
- W-9 & 1099
-
Docyt Setup, Personal & Business Settings
-
Navigation & Getting Started
-
Top FAQs from Business Owners
-
Docyt Mobile App
-
Accounts Payable
- Setup
- Managing and Processing Invoices
- The UPS Store®
- Document Management
- Vendor Credits
- Accounts Payable Approval Settings
- Bill Pay
- Docyt ACH
- Split Expenses
- Intercompany Settlement
- Vendors & Payees
- W-9 & 1099
- Invoice Queue
- Mark As Paid
- Payment Rules
- Receipt Box
- Copy Invoice Link
- Billable Invoice
- Merge Duplicate Vendors
- Docyt Check
- Split Invoice in Multiple Payments
- Split Invoice In Multiple Businesses
- Split Invoices
- Vendor Tax Profile
- QBO Sync Status for Invoice
- Docyt ACH Timeline
-
Flagged Transactions & Document Requests
-
Financial Connections
-
Expense Reports & Employee Reimbursement
-
Receipt Management
-
Business Reports & Budgets
-
Vendors, Payees, W-9 & 1099
-
Revenue Integration & Reconciliation
-
Reconciliation Center
-
Accounts Receivable
-
Business Mailroom
-
Accountant
-
Product Updates
-
Docyt University
-
Ledger Reports
-
Revenue Centre
-
Integration
-
Docyt Plans
-
Docyt Check
-
Expense Management
-
Connect Quickbooks
-
Docyt Copilot
-
Business KPI-Mobile
-
Settings
- Billing Information
- Business Settings
- Business Employees
- Business Reports & Metrics Settings
- User Roles in Banking Accounts
- Permission in Revenue Centre
- Permissions in Reconciliation center
- Permissions in Business Mailroom
- Permission in Vendor Module
- Permissions levels of flagged transactions
- Document Requests Permissions
-
Dashboard
-
Reports
-
Banking & Reconciliation
-
Docyt Modules
How to file your 1099's using Tax1099.com
- Ensure the Vendor is enabled for “Track Vendor to Generate 1099”

-
Select the year for the 1099 filing and select “Data Export”
a. This will provide a .csv file with the payment total for your selected vendors.
b. This information references the W9 information that is uploaded for the Vendor.

-
Navigate to Tax1099.com and select Start a “New Form”
a. You will need to select a 1099 NEC from the options for the vendors.

-
Import Bulk Data
-png.png)
-png.png)

- Ensure the filing year is correct and select “Next” to continue.

-
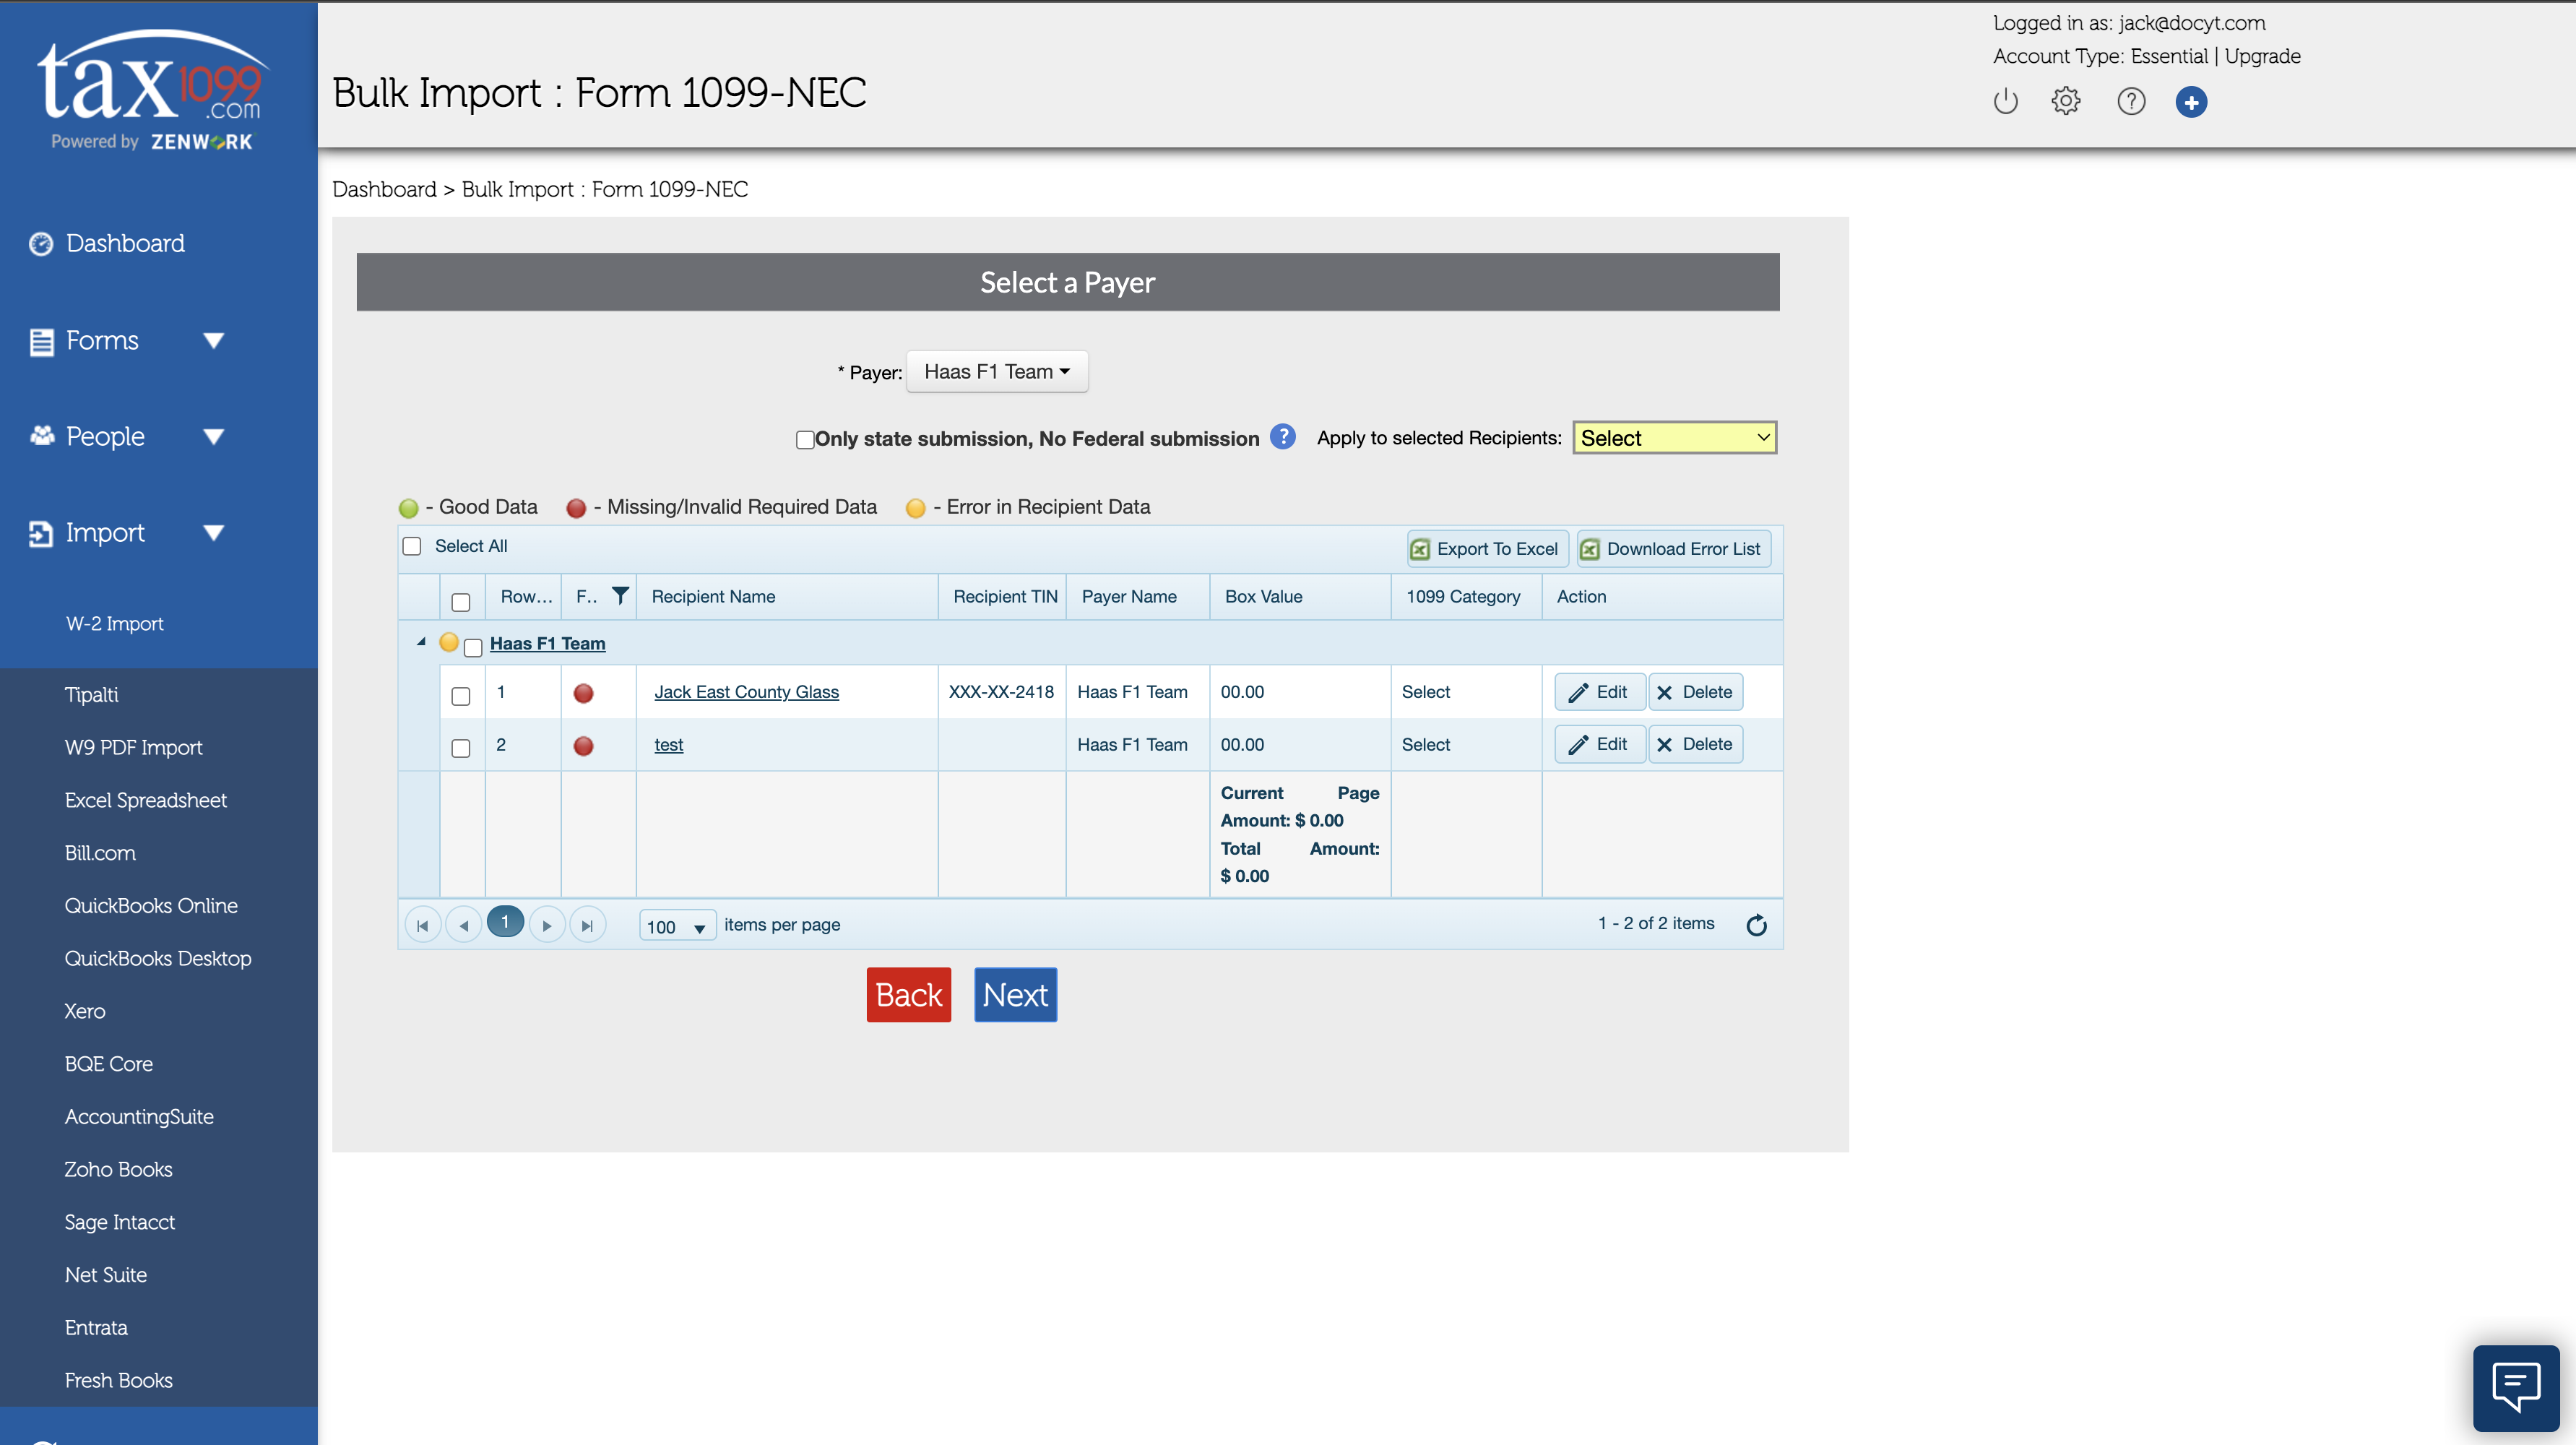
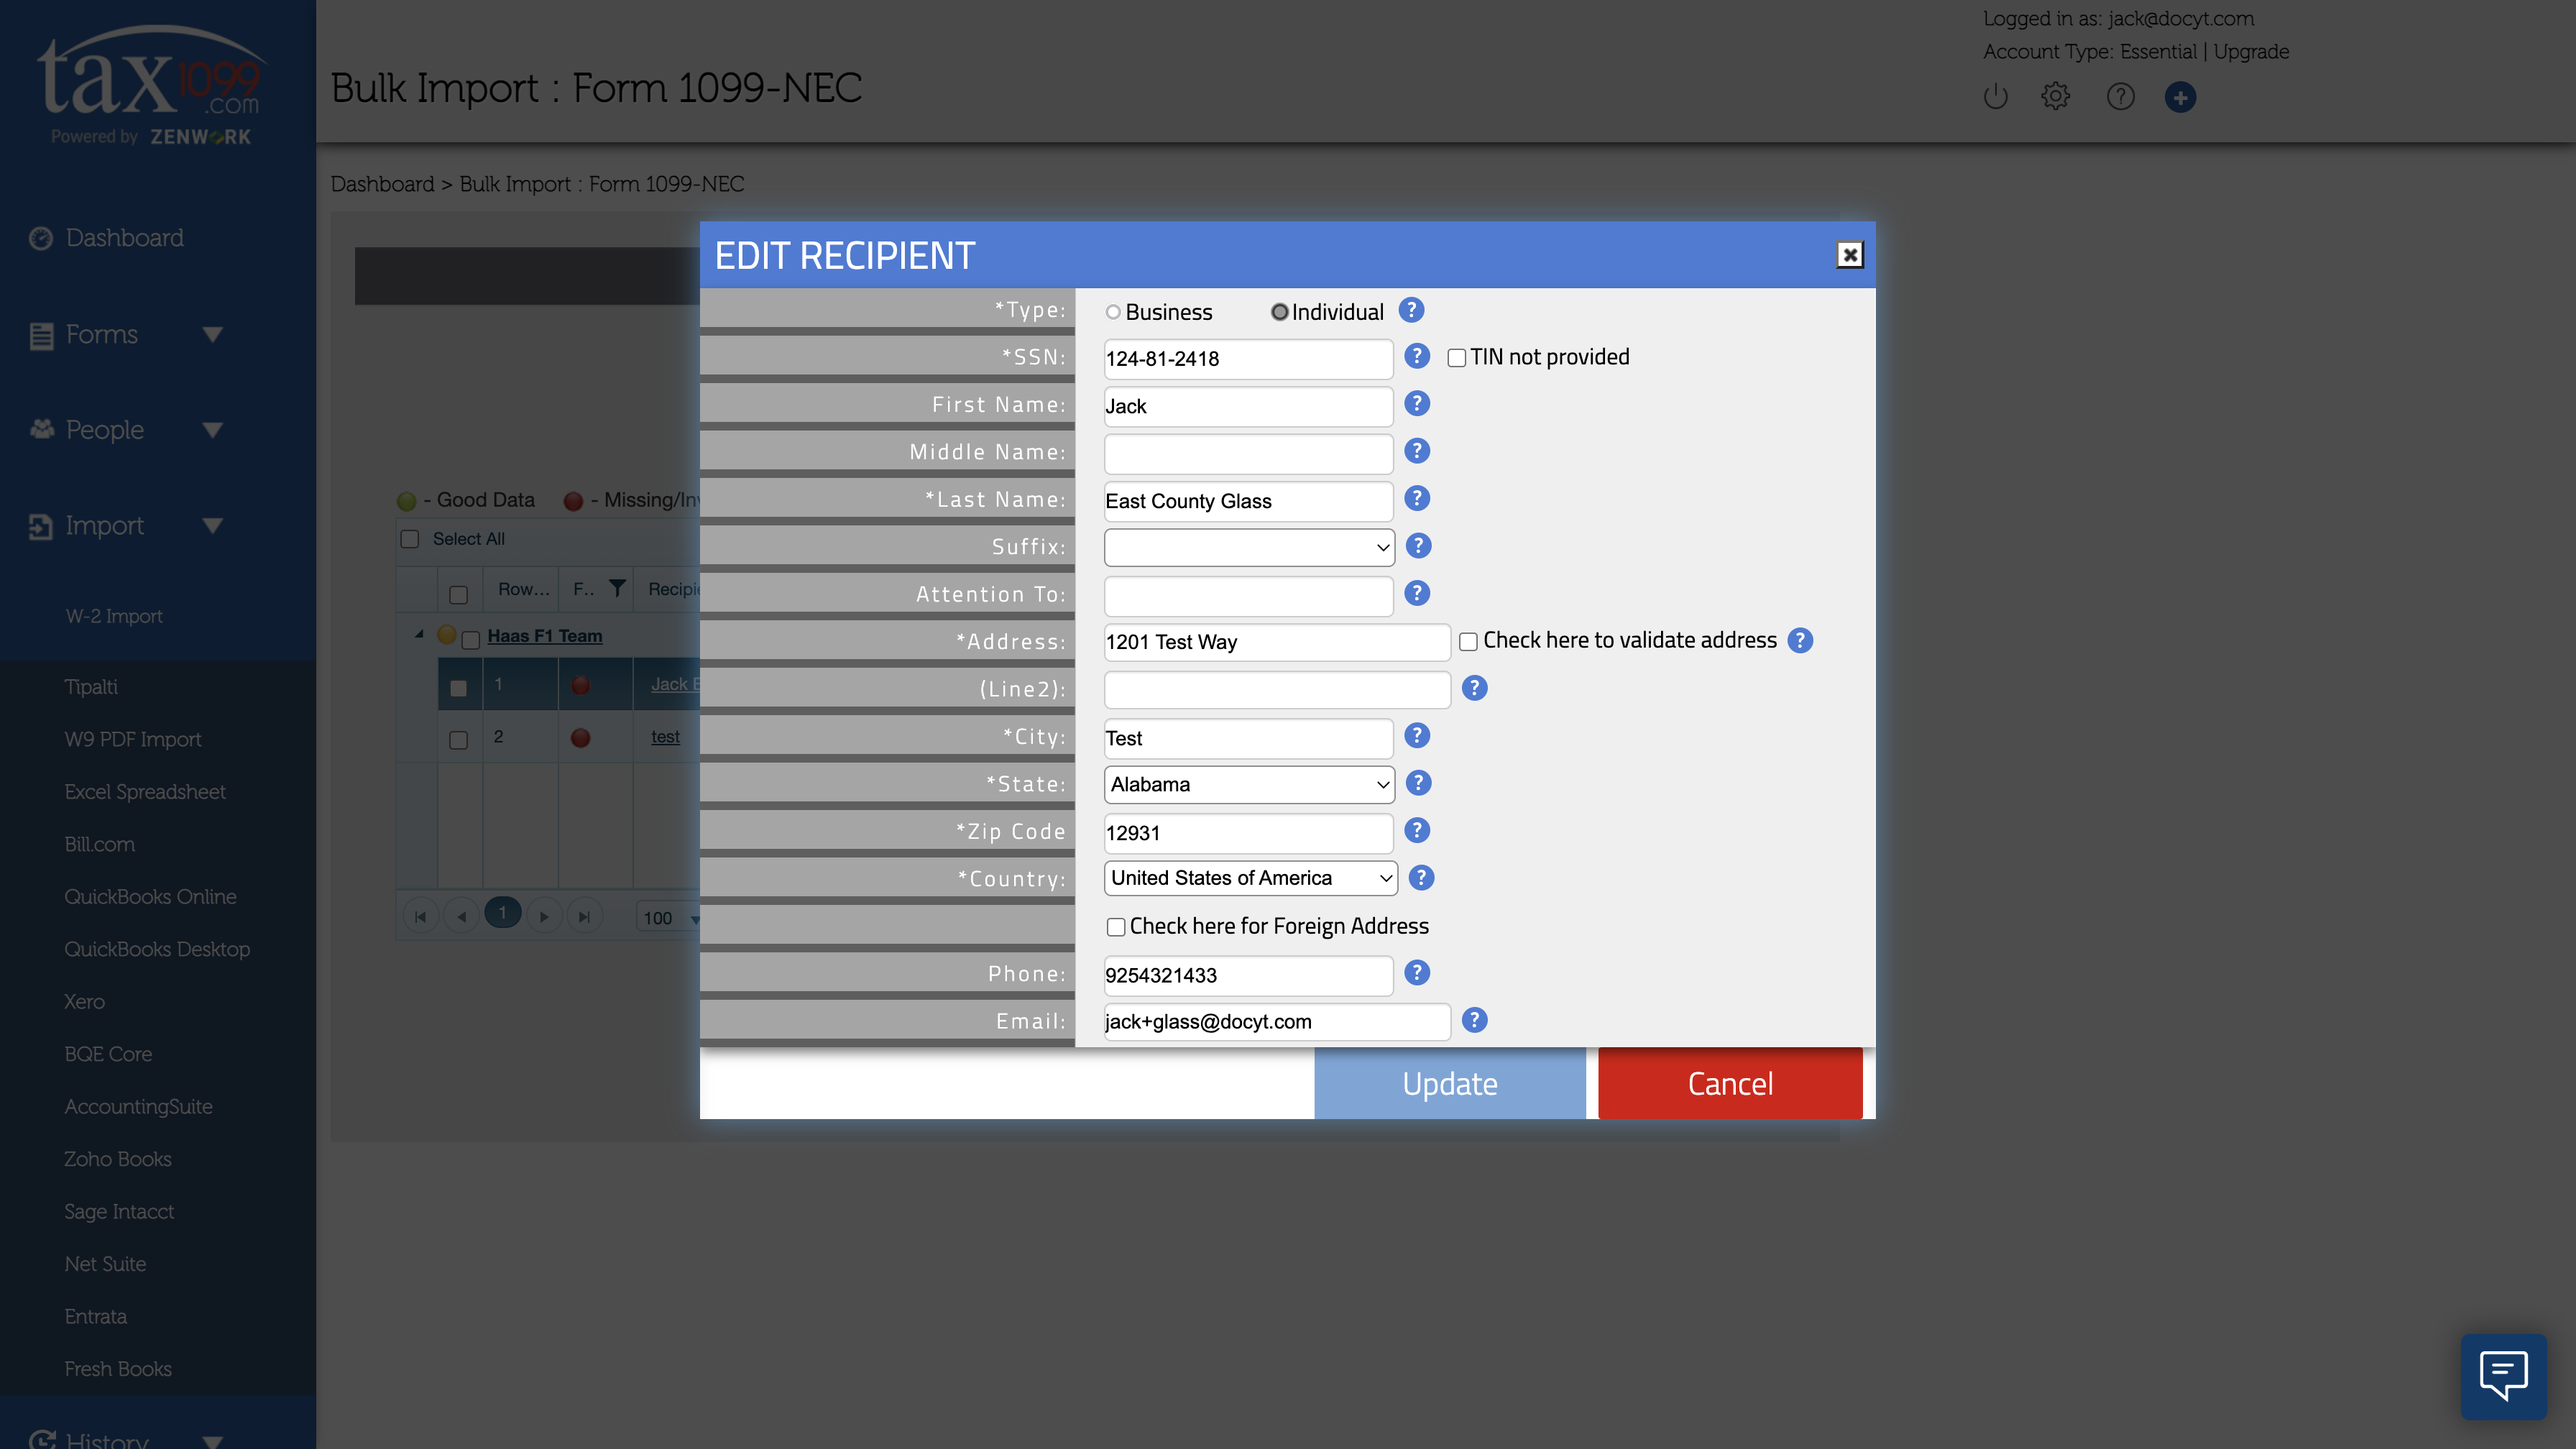
If the user has a red circle next to their name there may be issues with the data entered for that vendor.
A. If the vendor is red select the name of the vendor. This will open a module where you can fix any issues with the data.
b. Once fixes are implemented the icon will turn green and you are ready to proceed by selecting “Next”
- Lastly is the submission page, you can review the information for your vendors here.
a. You can make your last few changes for the 1099 filing on this page.
b. Once you are ready you can send 1099 for the selected vendors. This will allow you to send them to multiple Vendors at once.-png.png)