How to Mark an Invoice as Paid
Marking an Invoice as Paid after Verification and Payment
Marking an invoice as paid updates the system to indicate that the corresponding payment has been successfully recorded. This process helps track outstanding payments, reduces the risk of duplicate payments or overdue invoices, and aids in cash flow management by providing a clear overview of paid and outstanding invoices.
In Docyt, business owners have the authority to make payments. If an invoice or bill has already been paid, you can click on the dropdown menu next to the invoice amount in the 'Expense Management -> Accounts Payable -> Invoice Queue' menu and select the payment method that was used. This will help keep track of paid invoices and provide a clear record of how the payment was made.

-
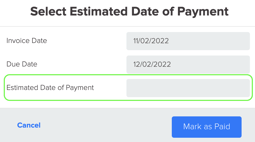
Cash: If the payment for the invoice is made in cash, you can easily mark it as paid in cash. Click on the 'Cash' option, and a window will appear where you can enter the estimated date of payment. After entering the date, click on the 'Mark as Paid' button to record the payment. This helps keep track of paid invoices and provides a clear record of how the payment was made.

-
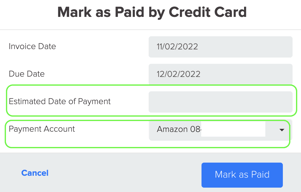
Credit card: To mark an invoice as paid using a credit card, indicate the payment date and select the appropriate card from the drop-down list. Then, click on the 'Mark as Paid' button to record the payment.

-
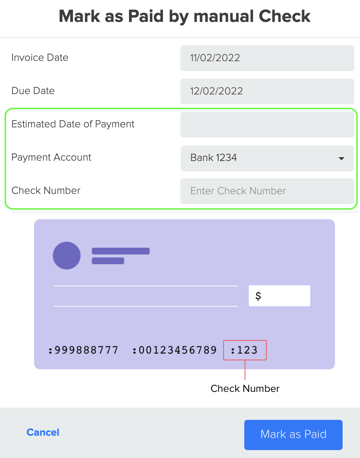
Manual check: If payment is made by a manual check, you can choose this option. Once selected, you will need to enter the payment date, bank account information, and the last four digits of the check. This ensures accurate record-keeping and helps track payments made by check.

-
Bank Account (ACH/Debit Card): If you choose to make the payment using a debit card or directly from your bank account, you can select this method.

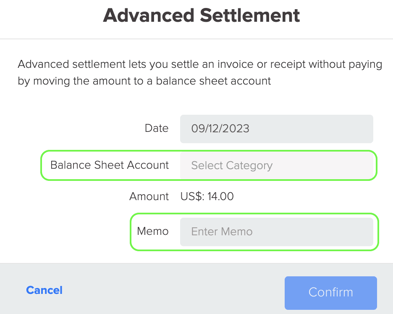
5. Advanced settlement: Advanced Settlement is a feature that allows you to settle an invoice without making a payment in inter-company settlements. Instead, the invoice amount is transferred to a balance sheet liability account. When you choose the 'Advanced Settlement' option, a dialog box will appear. In this dialog box, you need to enter the date (usually set as the last day of the month) and select the Balance Sheet Account (Payable account) of the other business. Then, click on the confirm button to complete the settlement process.

6. Vendor credit: This method is used when an invoice is paid using a credit from the same vendor. It allows for the settlement of an invoice by applying a vendor credit, resulting in the total amount of the invoice being reduced to zero. To utilize this method, select the option for vendor credit to create a bill payment of $0.