Inter-Account Transfers in Docyt
Docyt allows you to manage inter-account transfers within a management group, enabling or disabling the ability to move funds between bank accounts, employees, or vendors under the same group. This ensures greater flexibility and control over intra-group fund movement.
Enabling or Disabling Inter-Account Transfers for a Management Group
Enabling or Disabling Inter-Account Transfers for a Management Group
1. What Are Inter-Account Transfers?
Inter-account transfers allow businesses under the same management group to seamlessly move funds between different business or accounts of those businesses using Docyt. These accounts can include:
-
Bank accounts/Internal business bank accounts listed under Financial Connections or All Transactions in the Business section
-
Vendor payables/Bank accounts linked to vendors
-
Employee reimbursements/Accounts linked to employees
Note : ACH should be active for both the accounts in order to initiate a transfer.
How It Works
By default, inter-account transfers are disabled for all new management groups or newly added bank accounts.
2. Step-by-Step Guide
1. How to Enable Inter-Account Transfers?
To enable inter-account transfers for a management group:
-
Go to the “Business” module.
-
Navigate to Financial Accounts > All Accounts.
-
Click on the three dots menu (…) on the right side of the desired account.
-
Toggle the Inter-Account Transfer status:
-
Green icon: Enabled
-
Grey icon: Disabled
-
-
Click on Enable Inter-Account Transfer option from the drop down
-
A window will appear to fill in the bank details
-
Enter the bank details(last four digits of account) and click on save and send micro-deposits.
-
Fill in the micro-deposit amount to verify and click on ‘Verify Transaction’

-
The status icon changes from grey to yellow, and hovering over it should display: "Deposit verification is pending to enable inter-account transfer."
-
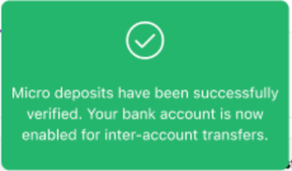
Once the micro deposit is completed, it will display a success message: "Micro deposits have been successfully verified. Your bank account is now enabled for inter-account transfers."

-
Bank account status icon changes to green.
-
Users will only see accounts available for transfer if ‘Inter-Account Transfer’ is enabled for those accounts and for the listed primary account under payment method .
2. How to Process Inter-Accounts Transfers?
Here’s how the process works for various scenarios:
A. Paying a Vendor
-
Add the vendor invoice in ‘Docyt Expense > Bill Pay > Invoice Queue’.
-
After adding invoice go through the standard verification and approval process.
-
When ready to process the payment, select Mark as Paid
-
Choose the appropriate bank account for the transfer
-
Once marked as paid, navigate to Financial Accounts → All Accounts
-
Move the cursor upwards and click Transfer Funds at the top-right of the screen to initiate the fund movement
-
Inter account transfer should be active before this transfer is done.
B. Reimbursing an Employee
-
Submit an employee expense report (instead of a vendor invoice)through Expense > Expense Report
-
Add Expense report in the new window that opens by filling the details.
-
Follow the same steps as above, using Mark as Paid and Transfer Funds
C. Transferring Between Internal Bank Accounts
-
Navigate to Financial Accounts > All Accounts.
-
Click on the “Transfer Funds” tab located at the top-right corner.
-
A pop-up window will appear. Fill in the required transfer details:
-
Source Account (from which funds are being transferred)
-
Destination Account (to which funds are being sent)
-
Amount and other relevant information
-
-
Click Transfer to complete the process.

Note : Once the transfer is initiated, Docyt automatically handles the accounting — including booking the transaction, matching, and applying the correct inter-company accounting treatment.
3. Register for Inter-Account Transfers
-
Navigate to Business > Financial Accounts > All Accounts.
-
Click on the "Inter-Account Transfer" tab in the left-hand panel.
-
Here, you can view a list of all transfers along with their current statuses.
-
If needed, you can also cancel a transfer, provided it’s still within the allowed cancellation window, directly from this tab.