Creating New User Access in SynXis Property Hub PMS (Property Management System)
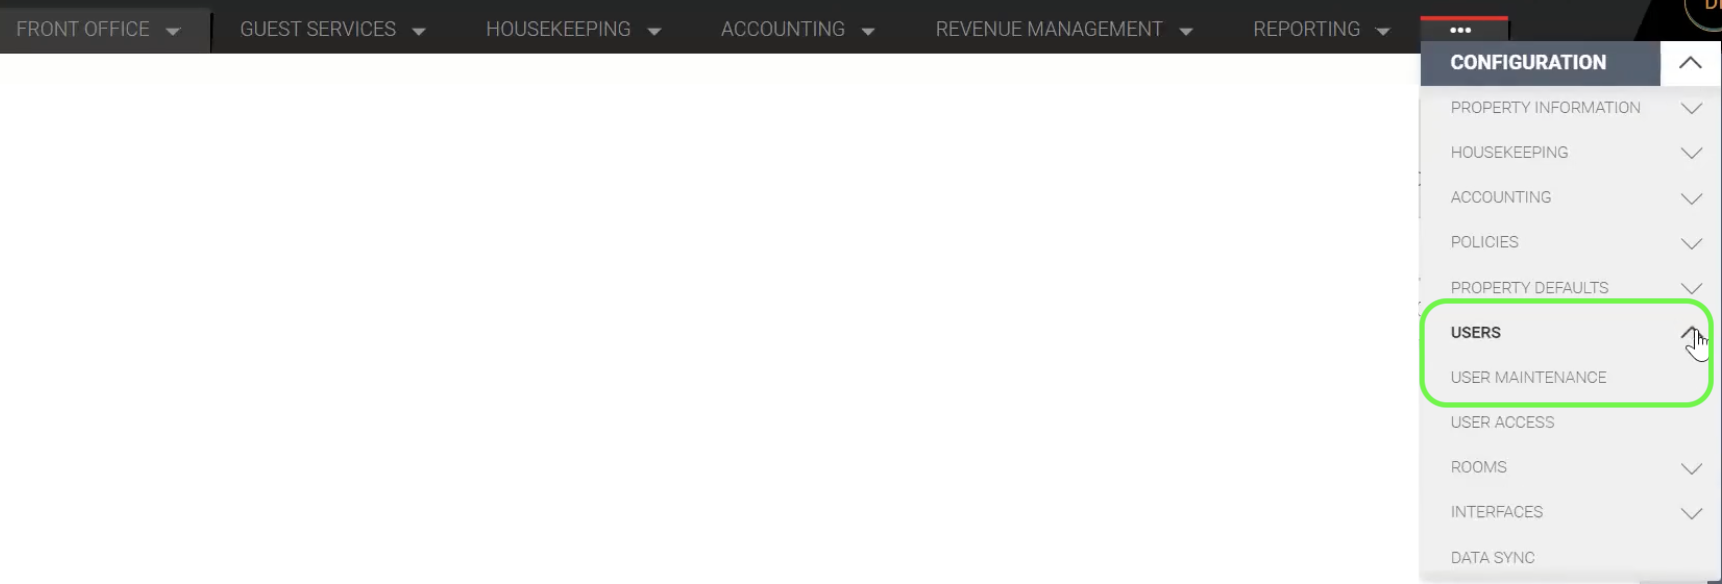
1. To access your SynXis Property Hub account, first, log into it. Then, click on the three dots located at the top right side of the screen. From the dropdown menu, select 'CONFIGURATION' to proceed.

2. Choose 'USERS' from the menu and then click on 'USER MAINTENANCE'.
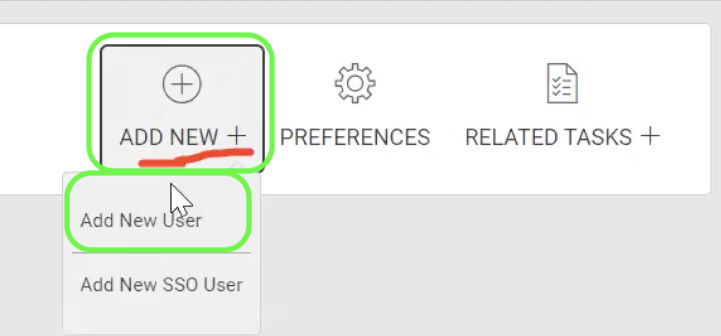
3. To add a new user in User Maintenance, simply click on the 'ADD NEW +' icon.

4. Select 'Add New User' from the drop-down list.
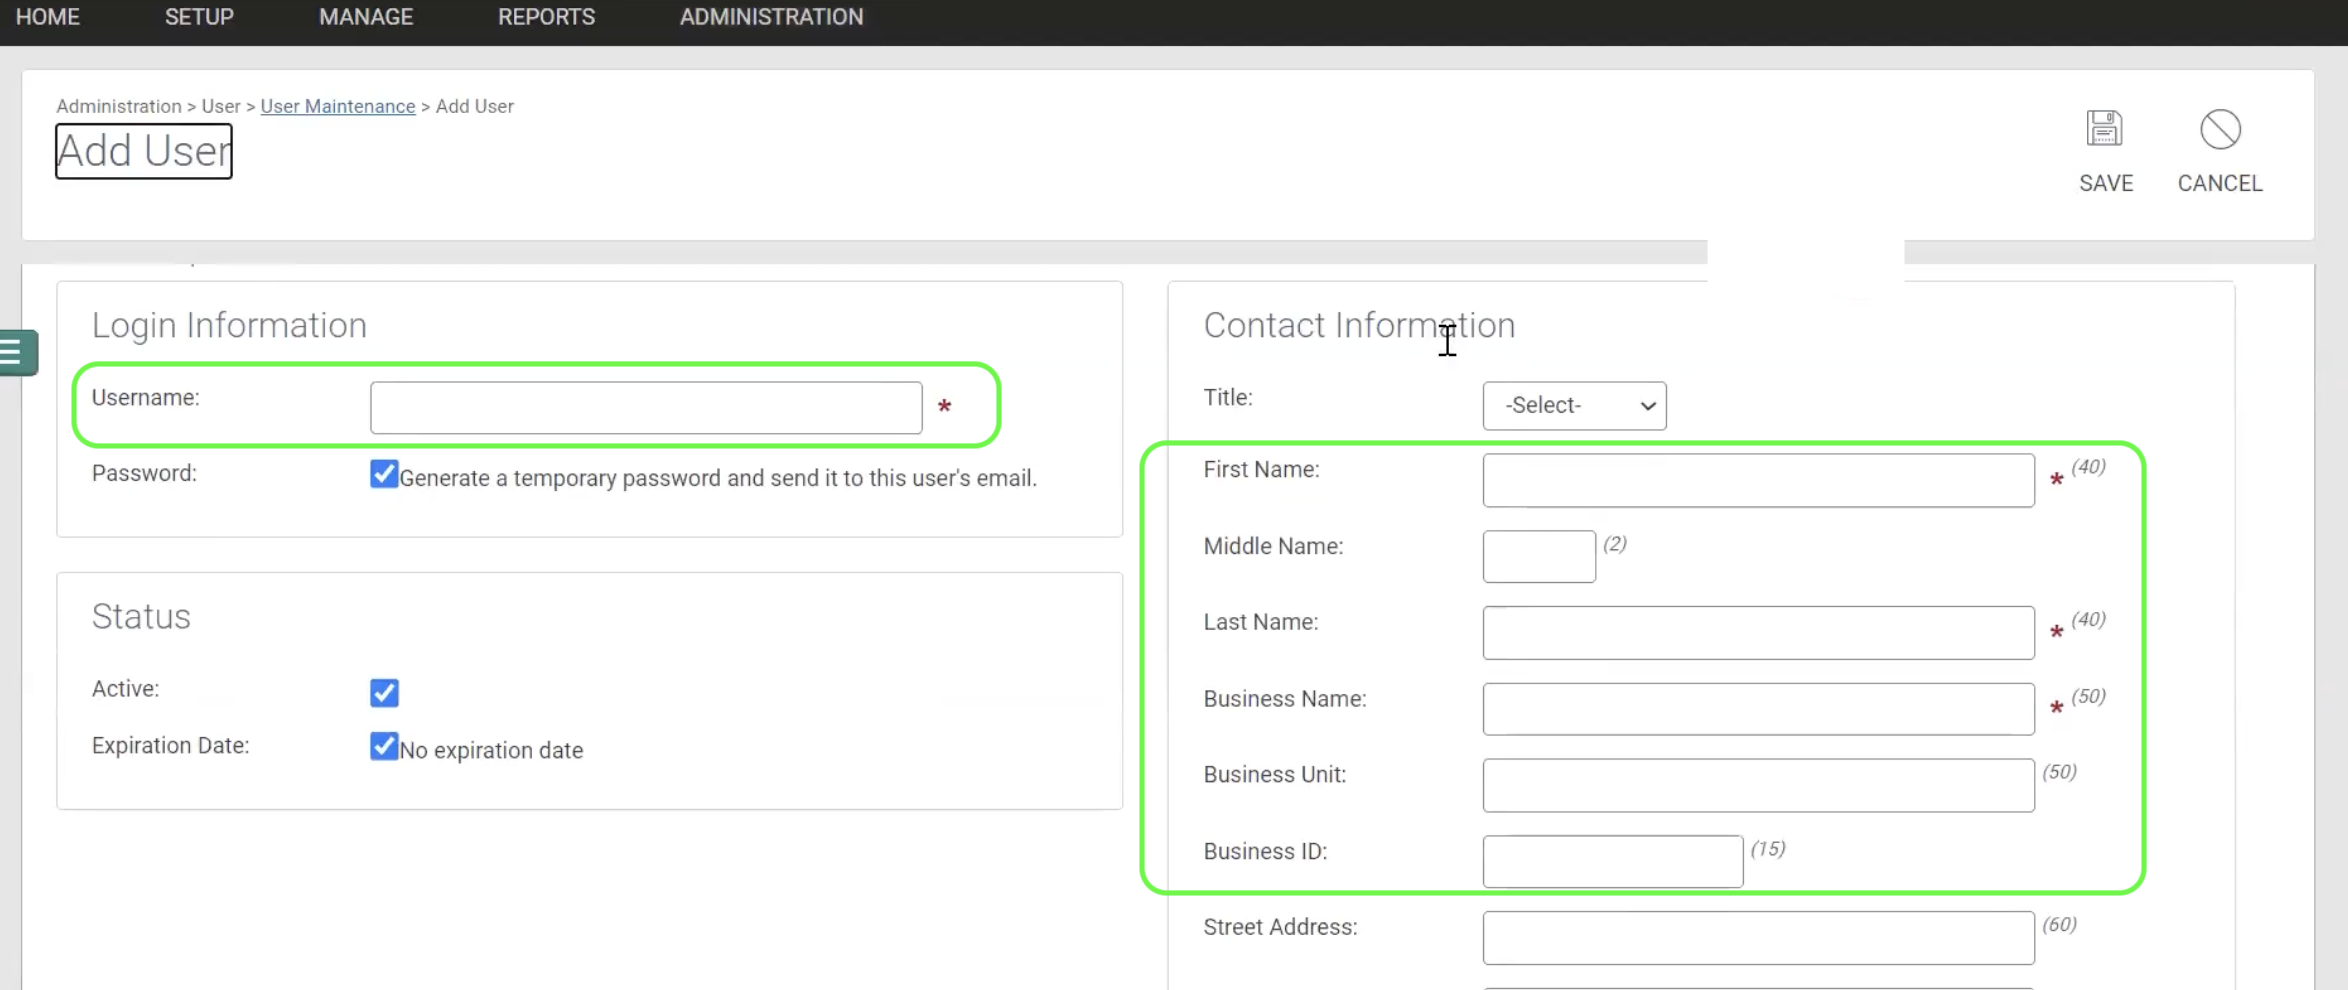
5. Provide the necessary login and contact information for the new user.
6. Also, make sure to include the email address of the new user in the contact information section.
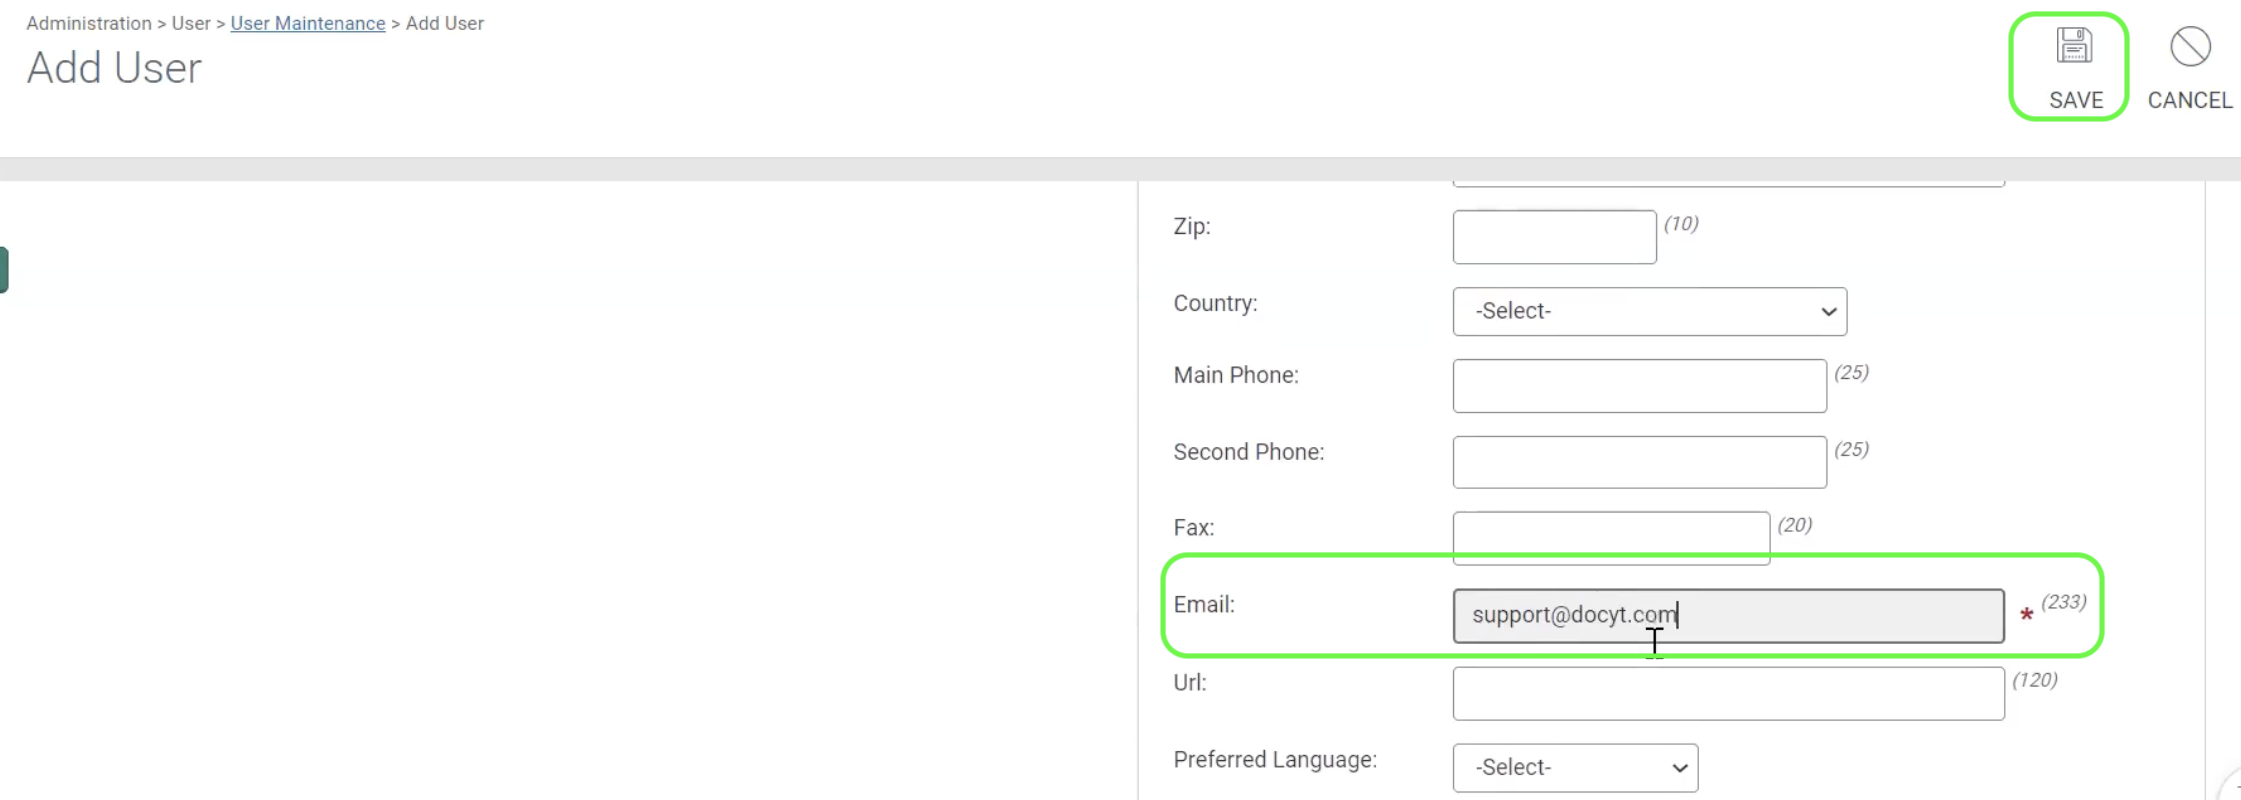
7. Save the contact information by clicking on the 'SAVE' button. After that, go to the 'Assignments' tab where you can assign this new user to one or more hotels or chains.

8. Click on the 'ASSIGN' button located under the Hotel Assignments section.
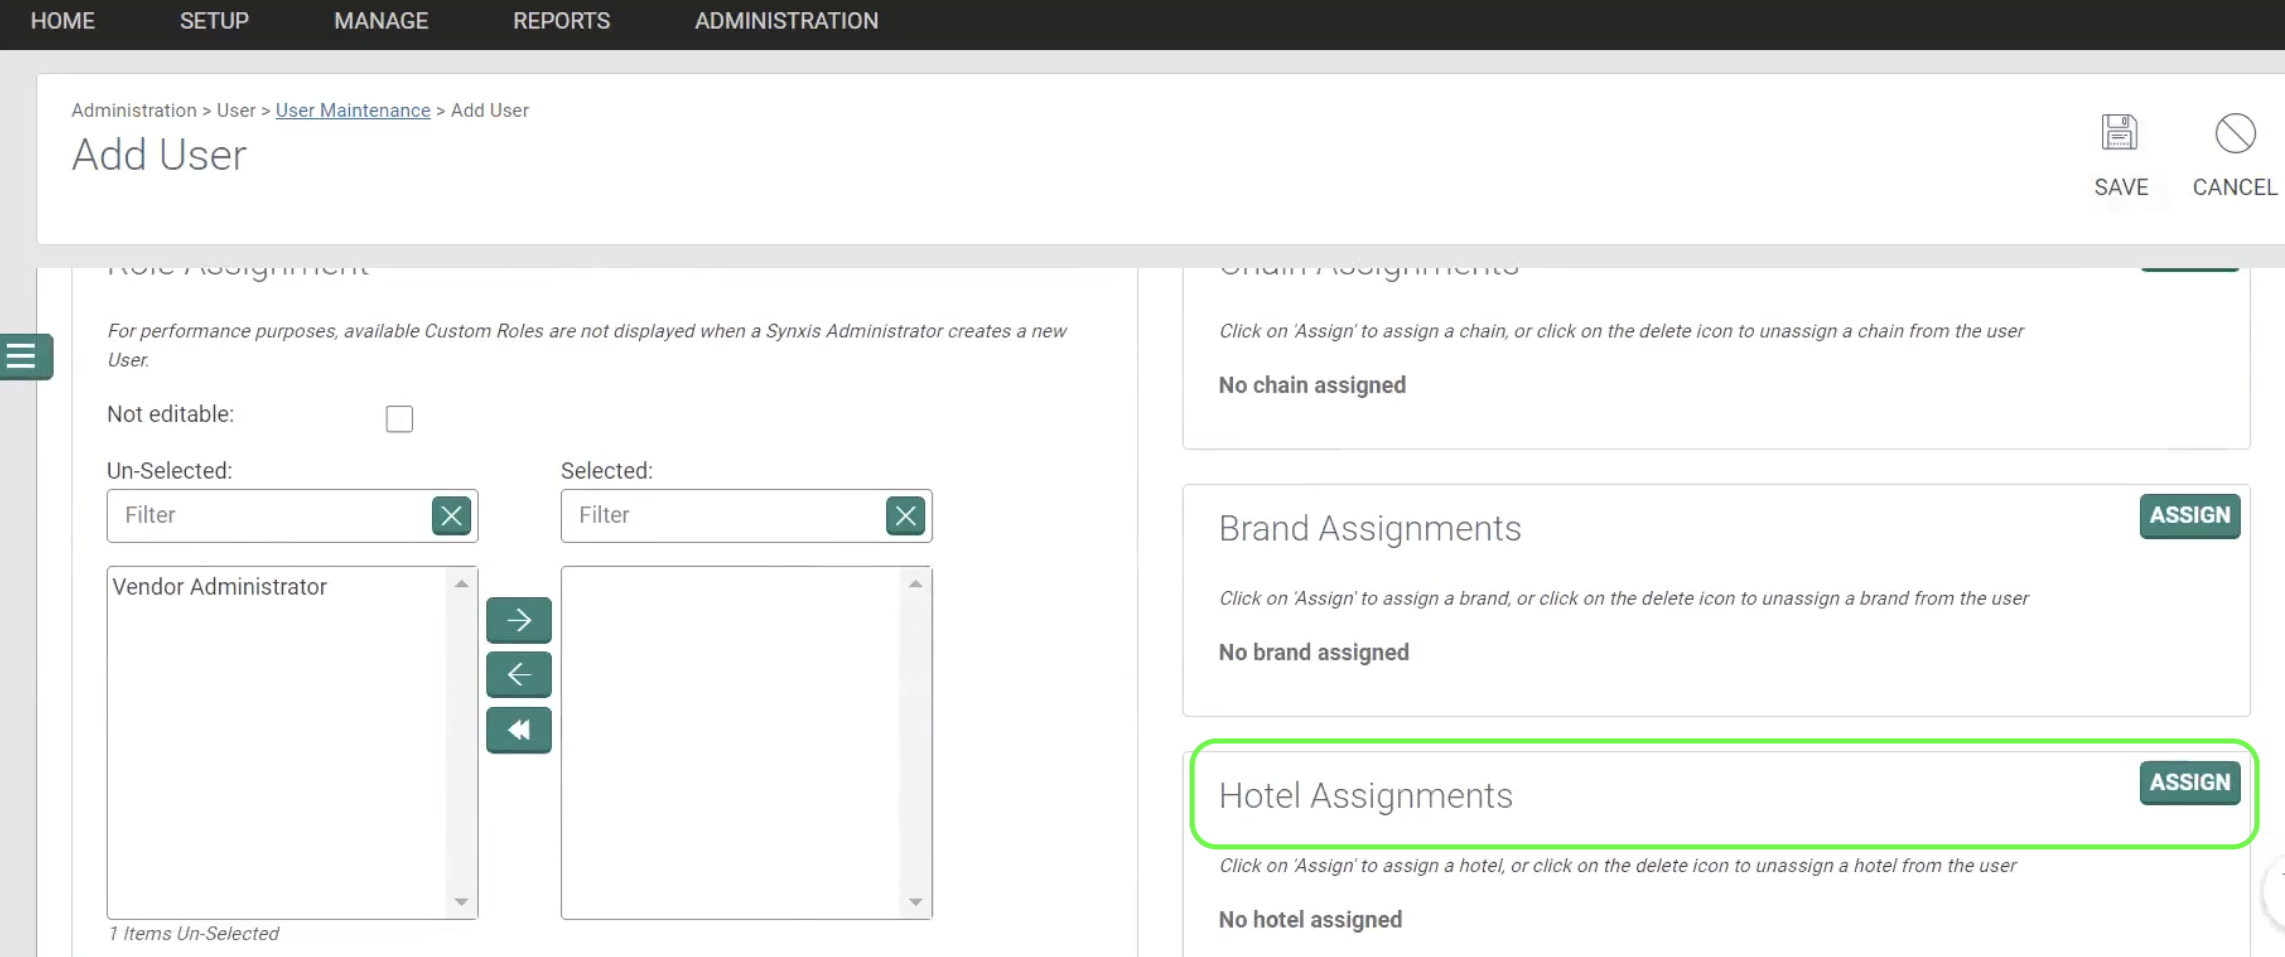
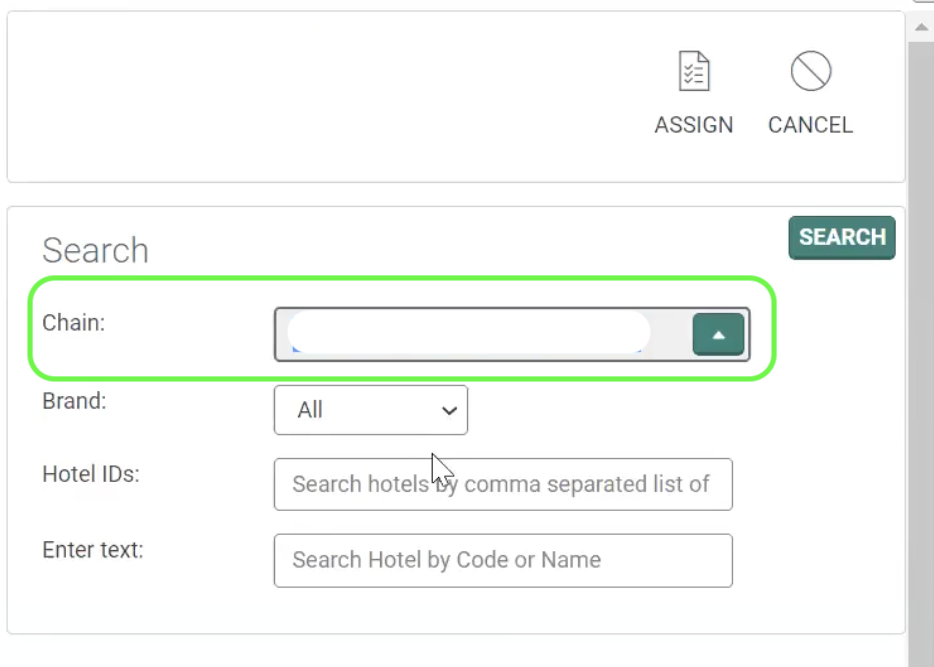
9. Enter the relevant information such as the Name of the Chain, Brand, and Hotel ID.
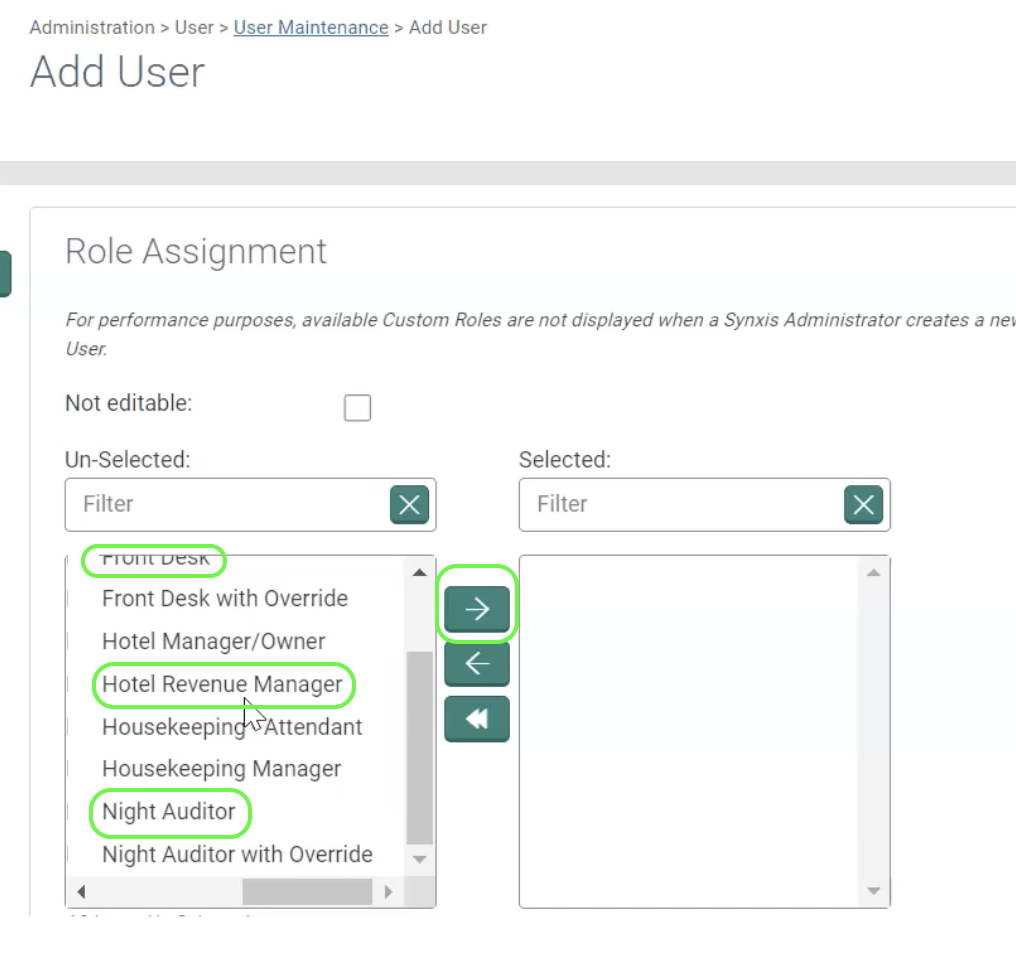
10. Assign the roles of Front Desk, Hotel Revenue Manager, and Night Auditor to the new user.
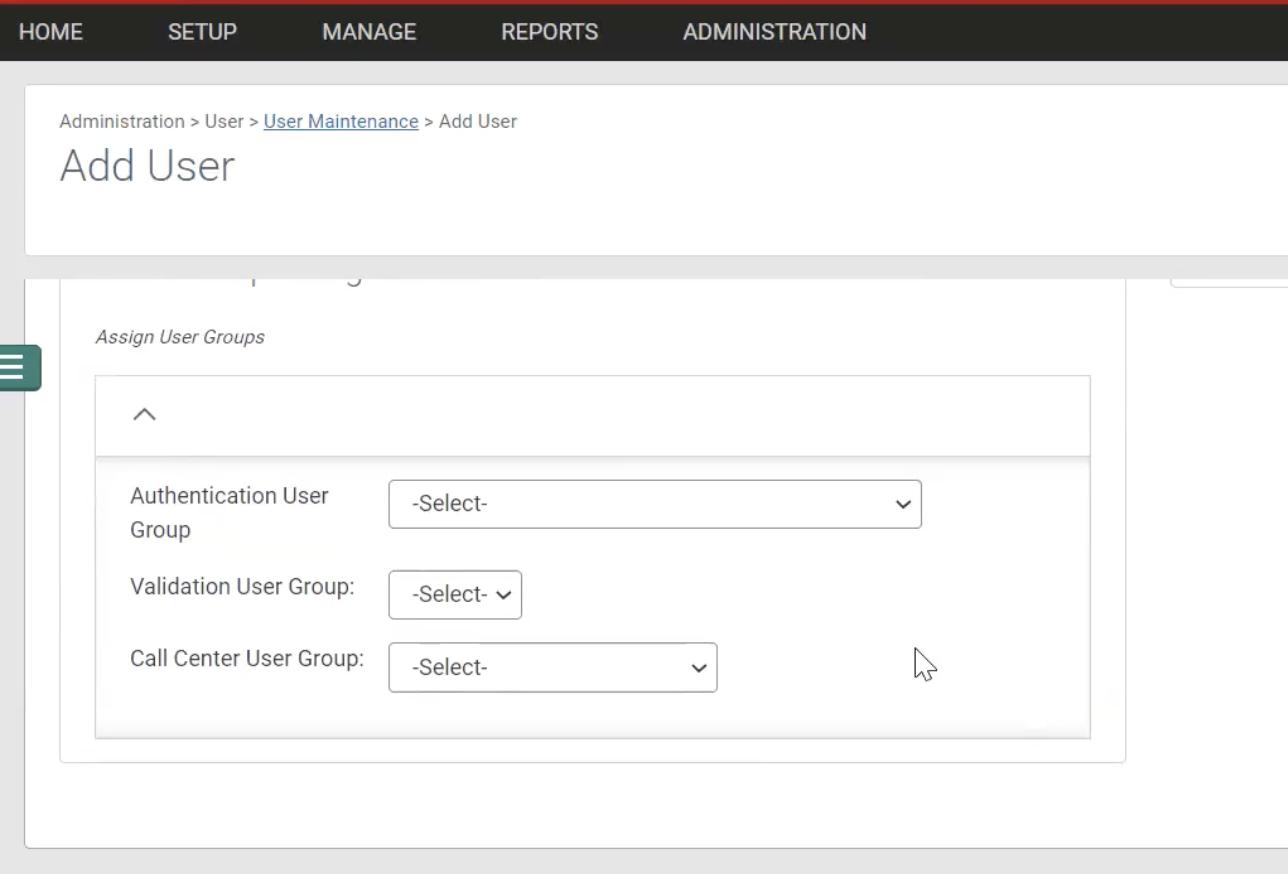
11. Assign the appropriate User Groups based on the user's role and responsibilities within the system.
12. The new user will be successfully added to SynXis, and they will receive a joining invitation via email. This invitation will be sent to the email address provided during adding the Contact Information section.