- Help Center
- Revenue Centre
- Revenue center
-
Docyt Setup, Personal & Business Settings
-
Navigation & Getting Started
-
Top FAQs from Business Owners
-
Docyt Mobile App
-
Accounts Payable
- Setup
- Managing and Processing Invoices
- The UPS Store®
- Document Management
- Vendor Credits
- Accounts Payable Approval Settings
- Bill Pay
- Docyt Full Service Check
- Docyt ACH
- Split Expenses
- Intercompany Settlement
- Vendors & Payees
- W-9 & 1099
- Invoice Queue
- Check Register
- Mark As Paid
- Payment Rules
- Receipt Box
- Copy Invoice Link
- Billable Invoice
- Merge Duplicate Vendors
- Docyt Check
- Split Invoice in Multiple Payments
- split statement to invoice
- Split Invoice In Multiple Businesses
- Split Invoices
- Vendor Tax Profile
-
Flagged Transactions & Document Requests
-
Financial Connections
-
Expense Reports & Employee Reimbursement
-
Receipt Management
-
Business Reports & Budgets
-
Vendors, Payees, W-9 & 1099
-
Revenue Integration & Reconciliation
-
Reconciliation Center
-
Accounts Receivable for The UPS Store®
-
Business Mailroom
-
Accountant
-
Product Updates
-
Docyt University
-
iOS
-
Ledger Reports
-
Revenue Centre
-
Integration
-
Docyt Plans
-
Vendor Payment Report
-
Docyt Check
-
Account Receivables
-
Expense Management
-
Connect Quickbooks
-
Docyt Copilot
How to Configure Revenue Integrations for UPS Stores
Learn how to configure the revenue integration for UPS stores in Docyt
Steps to Setup:
-
Sign in to your Docyt Account.
-
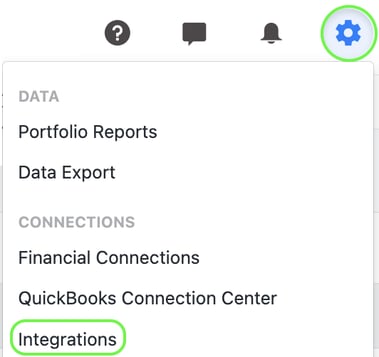
Click on the gear icon on the top right corner and select 'Integrations'.
3. Locate the business name for which you want to set up the integration. Click on it.
4. If multiple stores are available, click on the relevant store from the list.
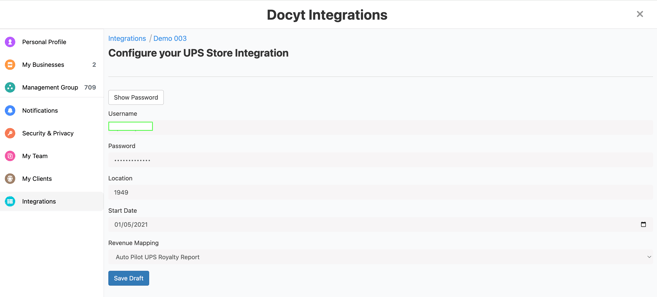
5. Find the revenue system you want to configure, then click the three dots on the right and choose ‘Configure’.
6. Provide the Username (FRS), Password (FRS), Location (Store Number), and Start Date in the respective fields.
7. Click ‘Save Draft’ to save your changes.
