How Can I Accrue Expenses for Prepaid Receipts in Docyt?
Accruing expenses is crucial for ensuring precise financial reporting, especially for receipts like prepaid business insurance spread across various periods. Utilize Docyt's advanced accrual functionality to manage these effortlessly.
Step-by-Step Instructions
- Log into Docyt: Access Docyt by logging in to the web app. Link here.
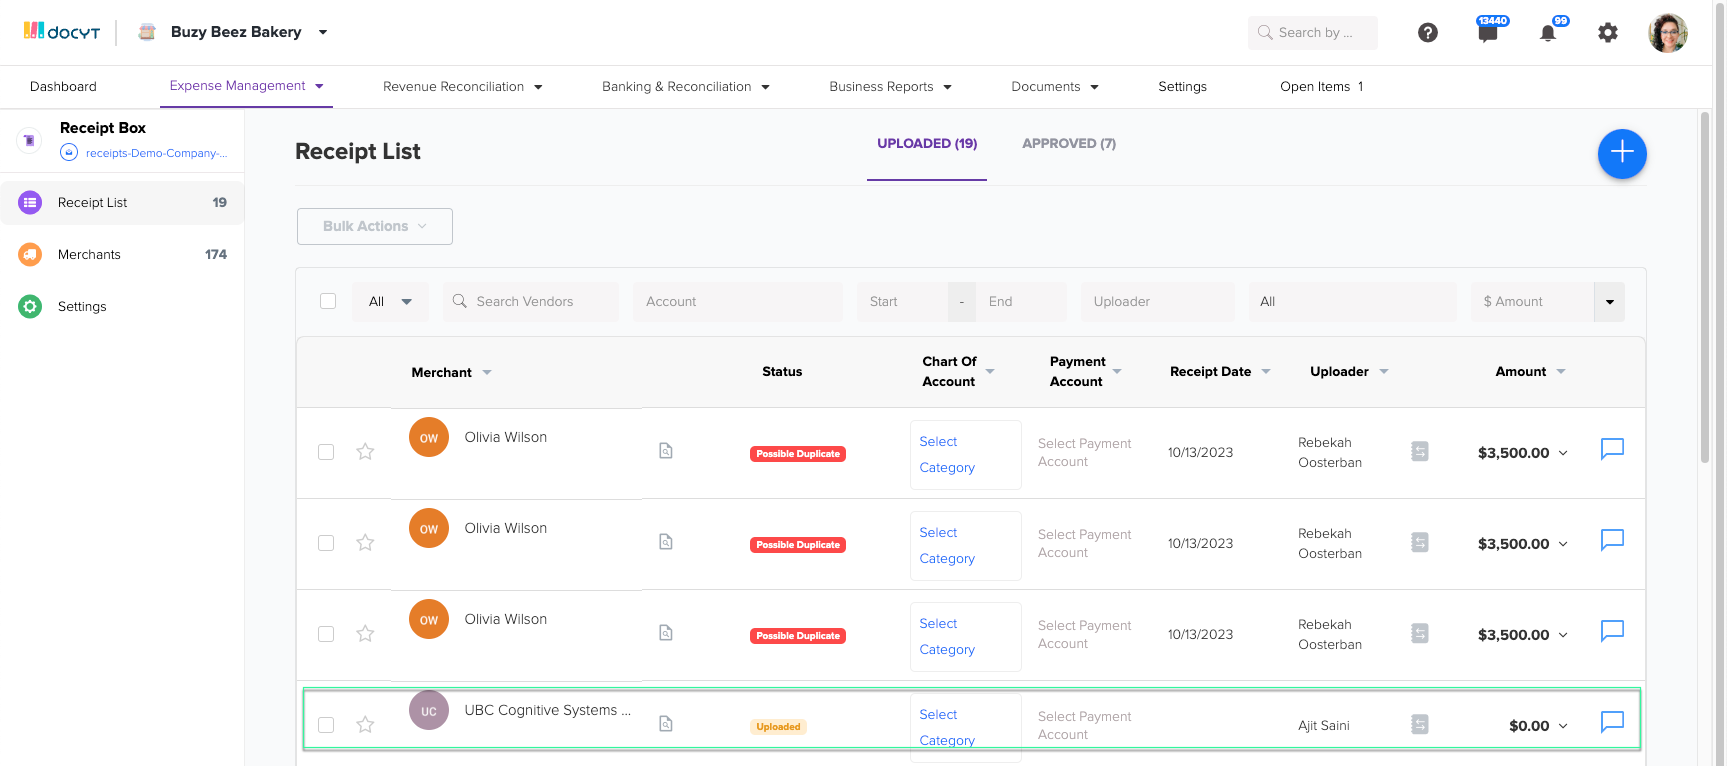
- To access the Receipt List, go to the top header menu and click "Expense Management." Select "Receipt Box" from the dropdown menu and choose "Receipt List" to view all your receipts.

-
Access the Receipt.
- Select the specific receipt that requires accrual by clicking on it.

- Select the specific receipt that requires accrual by clicking on it.
-
Initiate the Accrual Process:
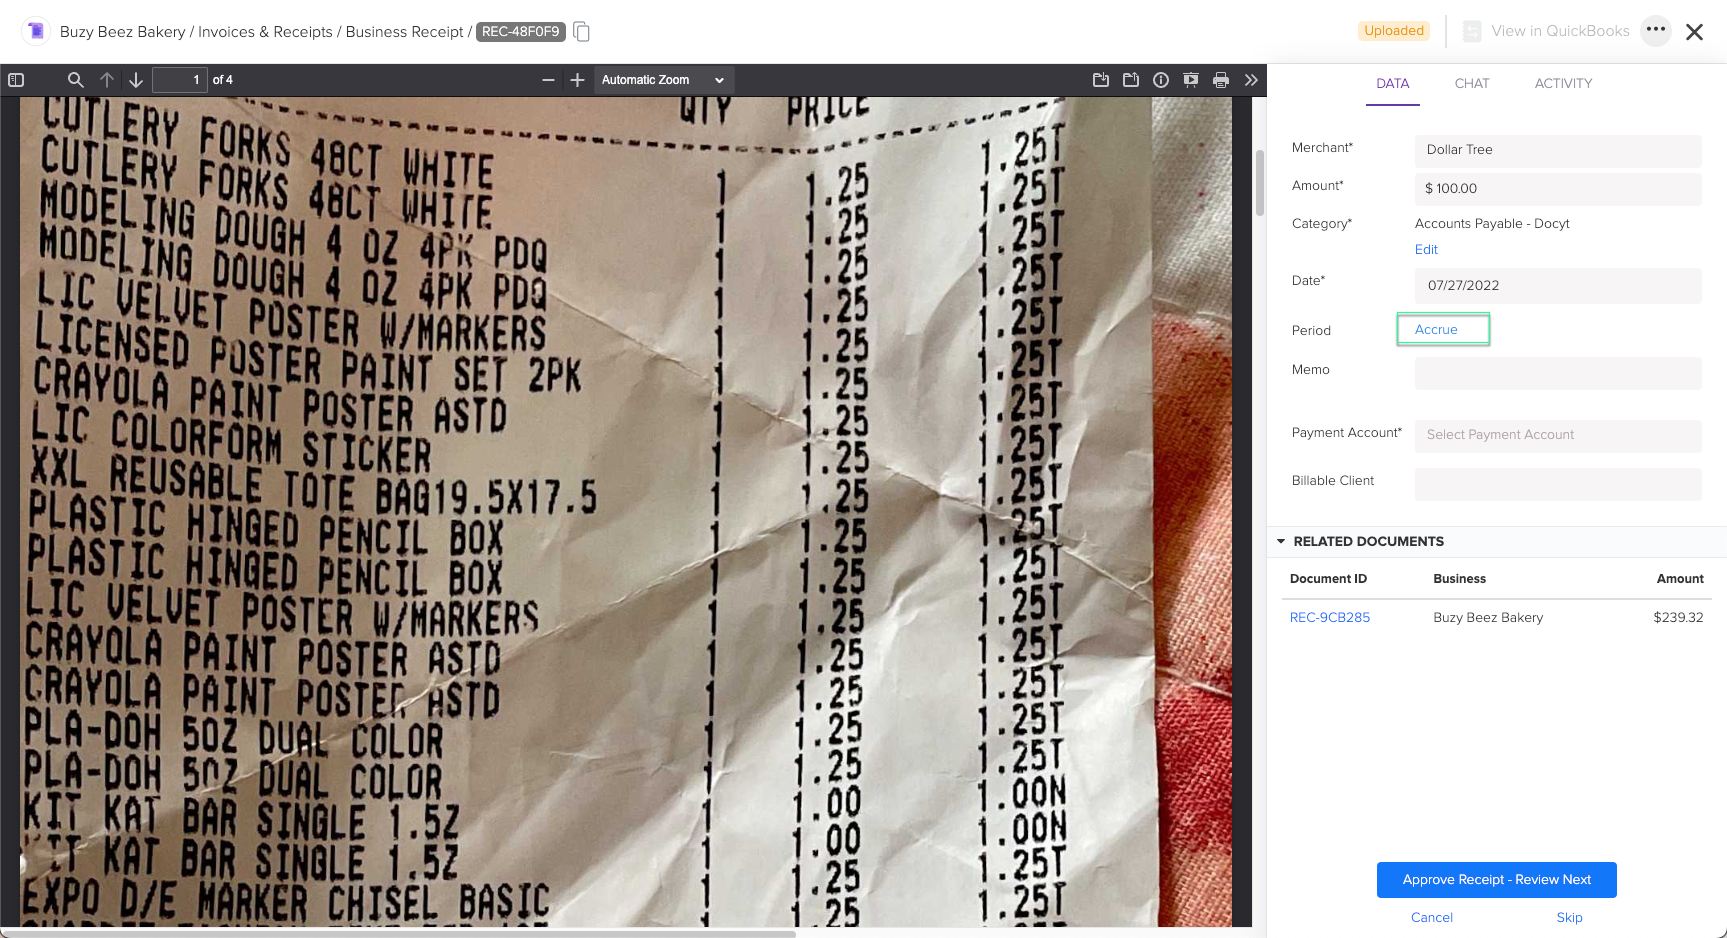
- Click on the blue "Accrue" hyperlink. An 'Accrue Receipt' panel will then be visible on the right side.

- Click on the blue "Accrue" hyperlink. An 'Accrue Receipt' panel will then be visible on the right side.
-
Determine Accrual Dates:
- Enter the 'Accrual Start Date' and 'Accrual End Date' for the selected receipt.

- Enter the 'Accrual Start Date' and 'Accrual End Date' for the selected receipt.
-
Select an Accrual Schedule:
-
Decide between 'Automatic' or 'Custom Schedule'.
-
Automatic Schedule: Docyt will autonomously compute the accrual amounts using your provided dates.
-
Custom Schedule: This option grants more flexibility. Here, you can:
- Specify unique amounts for each accrual period.
- Click "Custom Schedule," then manually determine each interval's dates and corresponding amounts.

-
-
-
Save the Settings:
- After ensuring all details are accurate, tap "Save" to confirm the accrual preferences for the receipt.

- After ensuring all details are accurate, tap "Save" to confirm the accrual preferences for the receipt.
Defining Accrual Journal Entry Amounts
The custom schedule option allows you to control the journal entry amounts for each accrual period. By selecting the "Custom Schedule" option, you can set the specific amounts you want to accrue for each period based on your business needs.
Accruing expenses with Docyt's flexible accrual feature allows for better financial control and ensures accurate reporting of prepaid receipts.
Docyt Subscription Requirement: This feature is available in the following Docyt subscriptions.
- Expense Management Back Office
- Corporate Credit Card Management
- Insight Plan w/ Expense Management
- Insight Plan w/ Corp Card Management
- Impact
- Advanced
Please refer to our Docyt Pricing page for a detailed breakdown of features across different subscription tiers.