
Table of Contents
- How to create a self-print check
- How to view the check register
- How to download and print checks in bulk
Create a Self-Print Check
-
Login to your Docyt account.
-
Locate and click on the "Expense Management" drop-down menu.
-
From the drop-down menu, select "Accounts Payable".
-
In the Accounts Payable section, you will find various options. Click on "Invoice Queue".
- Your invoice must be in the "ready to pay" status in order to create a self-print check in Docyt. If your invoice is not in the "Ready to Pay" status, please verify or approve the invoice before proceeding.

- Your invoice must be in the "ready to pay" status in order to create a self-print check in Docyt. If your invoice is not in the "Ready to Pay" status, please verify or approve the invoice before proceeding.
-
Now, click on the drop-down menu of the invoice you wish to pay.
Select "Pay by Docyt Check."
-
Select the three dots on the right upper corner of the invoice and choose “Self-Print Check”

-
Confirm the payee, amount and address in the detail section of the invoice. Now, click on the blue generate check button.

-
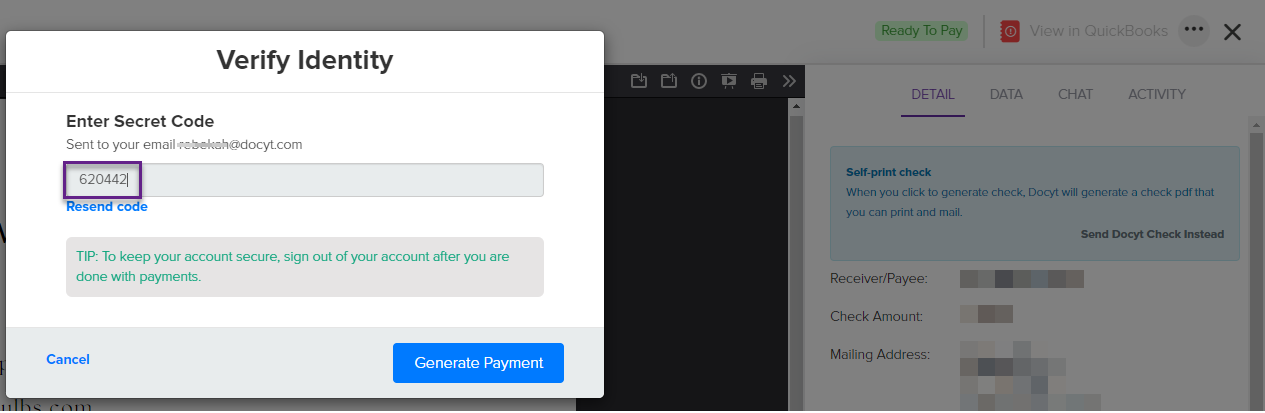
A secret code will be sent to your email address. Please don't close the window.

-
Check your email for the code.

-
Enter the code into the security code field and click on the blue "generate payment" button.
-
Your check will automatically download. Check your download folder for the .pdf file. Make sure you have blank check stock in your printer. Open the file and select print.
- Docyt provides users with customisation options for self-print checks. By default, these checks will include a digital signature. If users prefer to generate self-print checks without a signature, they can easily reach out to their Docyt Account Managers or contact Docyt Support for assistance.
Steps for Check Printing:
Step 1: Use the Recommended Check Stock Paper
Please make sure you are using our recommended check stock paper for optimal print results. You can purchase it from the following link:
Buy Check Stock on Amazon
Step 2: Download the Check Before Printing
Do not print the check directly from your web browser. Instead, follow these instructions:
-
Click the download icon or link to save the check PDF to your computer.
-
Open the downloaded file using a PDF viewer (e.g., Adobe Acrobat Reader).
-
Print the check from the PDF viewer application.
Note: Printing directly from a browser can cause misalignment due to inconsistent browser print settings.
Step 3: Follow Proper Print Settings
When printing from a PDF viewer:
-
Set the page size to Actual Size (or 100% scale).
-
Ensure Page Scaling is turned off.
-
Use standard 8.5" x 11" paper settings if prompted.
How to view the check register:
TIP: View Check Register
- Select "Check Register" from the left navigation menu.

- Locate your recent check payments in the register.
- Here, you can view checks and their associated invoices.
- You also have the option to cancel checks.
Cancel checks.
Download & Print Checks In Bulk
- Access the Check Register screen in the Accounts Payable module.
- Filter the transactions by selecting "Self-Print Checks"
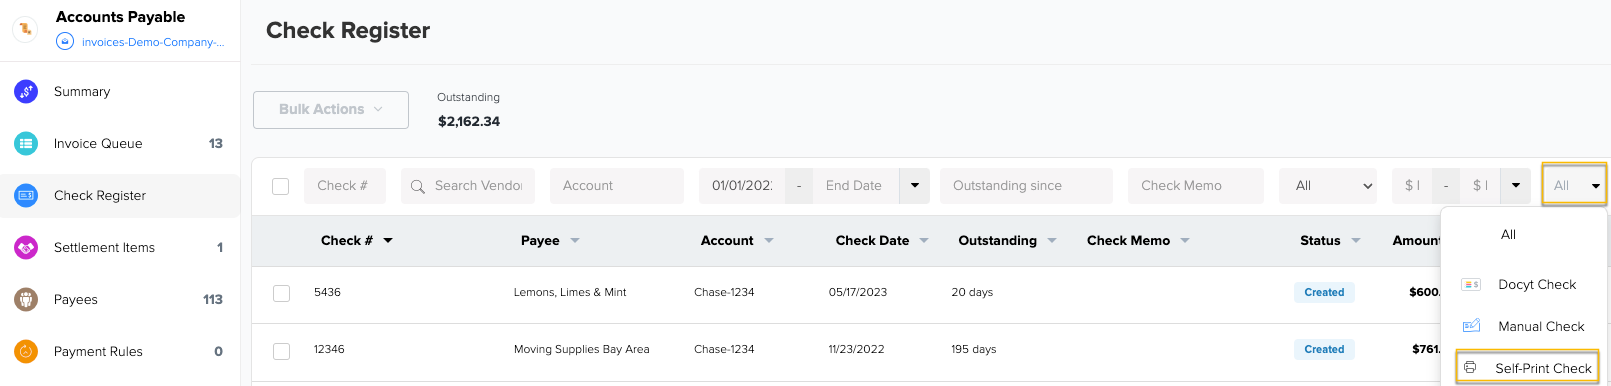
- Choose the checks you want to download.
- Click on the "Bulk Actions" drop-down menu and select "Download Printable Checks".
- The selected checks will be downloaded as a single PDF file.
- To locate the downloadable PDF file, navigate to the gear icon and select "Data Export".