New: Bulk Add a Vendor to Multiple Businesses
July 2023 Docyt Product Update
Efficient vendor management is crucial for smooth business operations. To help you streamline this process, we've introduced the ability to add a Vendor to multiple businesses at once. This guide will walk you through the process and show you what to expect. As a business owner, you can now add a Vendor and choose to link this vendor to all your businesses. This feature significantly reduces the time and effort needed to update multiple business accounts with the same vendor information.
How It Works
Businesses Tab
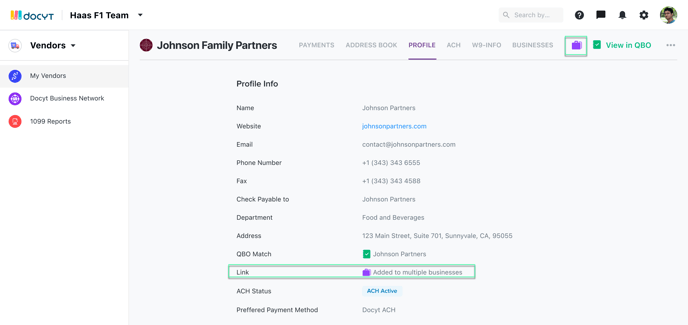
Within the Vendor information section, there's a new tab labeled "Businesses". This tab contains a description that reads: "Selecting 'edit' will allow you to link this vendor's information to the selected businesses. Additionally, all edits and changes to this vendor will be pushed across all selected businesses.”
Edit Linked Businesses
Clicking 'Edit' will open a business selector window with the title: 'Edit Linked Businesses'. 
Here, you will see a list of all businesses that you, as a business owner, have access to. Once you have selected the businesses to link with the vendor, these choices cannot be undone. After confirming your selections and clicking 'Save', a progress window titled 'Vendor Link in Progress' will appear. This window shows the progress of the vendor linking process, reminding you not to close the window or click the back button on your browser until it's complete.
Vendor Linking Completion
Upon successful completion, a notification stating 'N Vendor Link(s) was created successfully' will appear, with N being the number of linked businesses.
From this point onwards, any edits you make to the vendor information will reflect across all linked businesses. For instance, if the vendor details are curated or merged, these changes will be mirrored in all businesses displaying that vendor.
 Vendor Badge
Once the Vendor has been linked to multiple businesses, a badge will be displayed in the "My Vendors" list. This badge will be visible in every "My Vendors" list where the Vendor appears. It is positioned inside the Vendor box, next to the QBO Connection Status.
Access Control
To link a vendor to another business, you must have 'Vendors: Admin' rights. You can only add vendors to the businesses that you are a 'Vendors: Admin' for.
We hope you find this new feature beneficial for managing your vendors across multiple businesses. Should you have further questions or need additional assistance, don't hesitate to reach out to our support team.