
Statement Upload:
1. If you have the statement in your Docyt business mailroom, you can easily send it directly to the reconciliation center. For a detailed guide on this process, click here.
2. You can easily upload the PDF file directly as well. For detailed instructions on uploading a bank statement in Docyt, refer to the article provided here.
Statement Approval and Verification:
1. To find the bank or credit card statement that needs to be approved/verified, select Banking & Reconciliation-> Reconciliation Center-> Month End Documents-> Bank Statements.

2. The 'Bank Statements' page provides a comprehensive list of all your bank and credit card accounts, showing the status of each statement on a month-to-month basis.

3. When you hover your cursor over a month, you will see different statuses of a bank statement represented by corresponding icons.

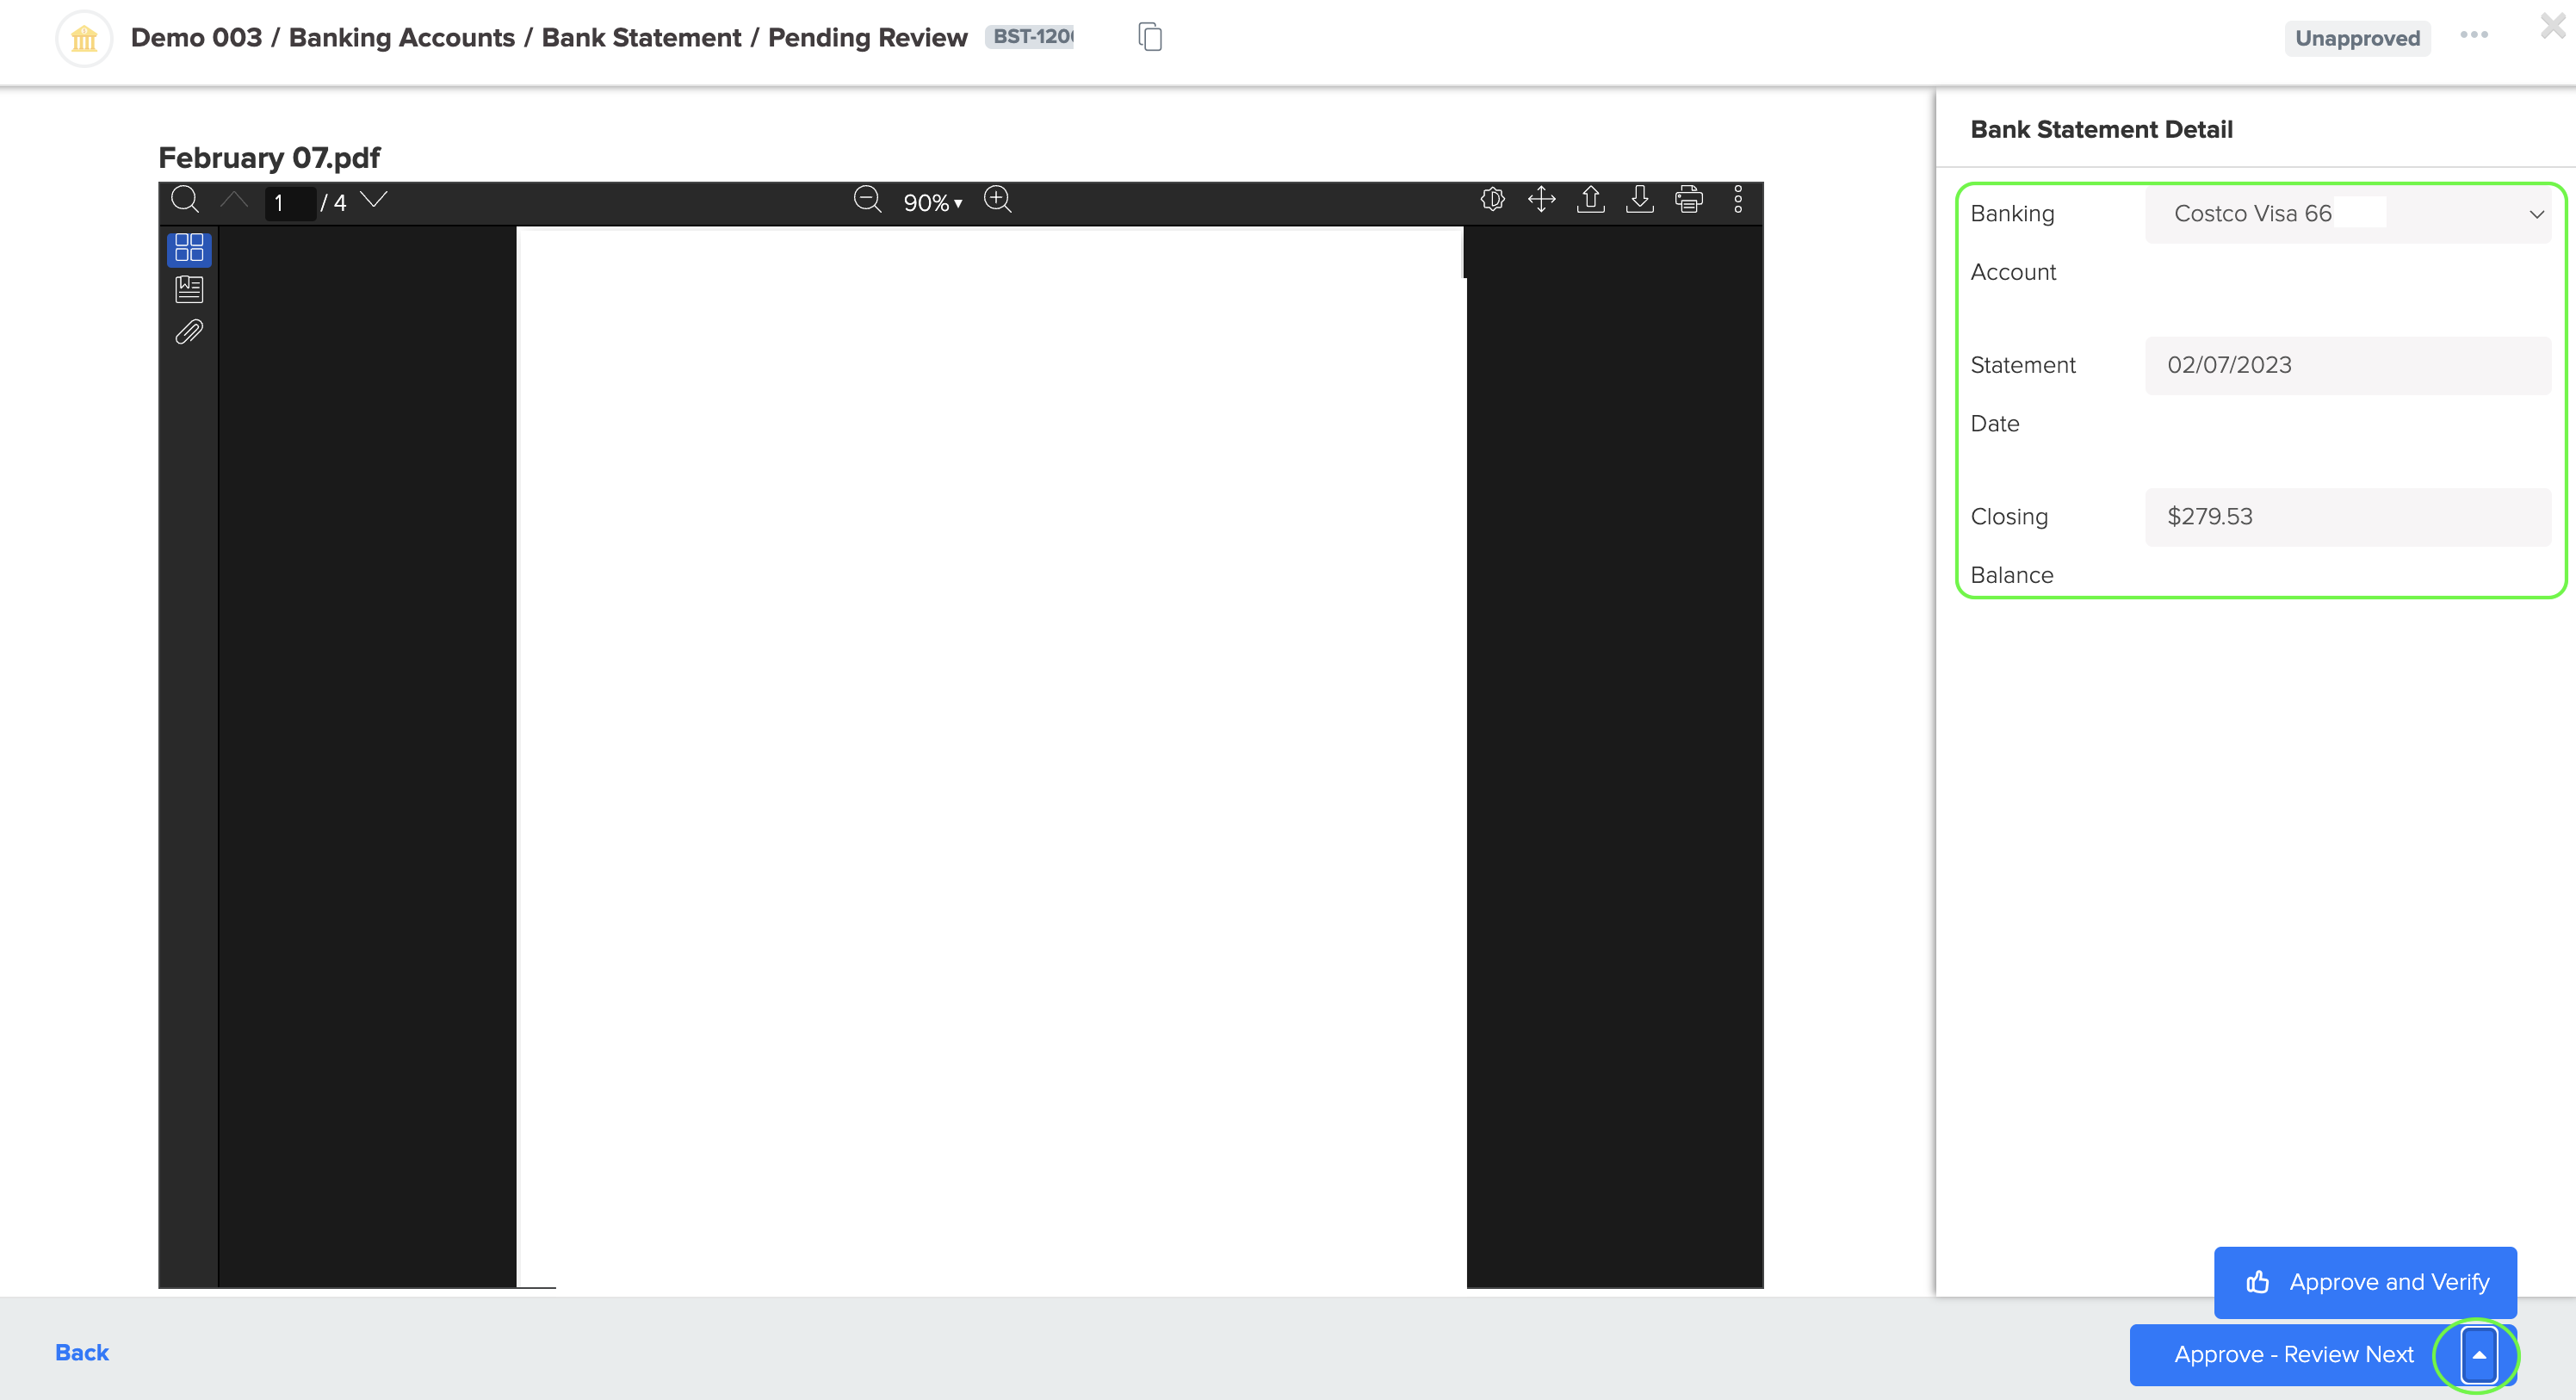
4. Look for the 'Statement uploaded' icon and click on it. This action will open a window displaying the details of the bank statement. From there, you have two options to mark the statement as approved. You can either click on 'Approve-Review Next' to move the statement to the 'Approved' status and load the following statement for review or click 'Approve and Verify' to mark the statement as approved and load the verify statement view. Both options provide a seamless way to manage and approve your bank statements.
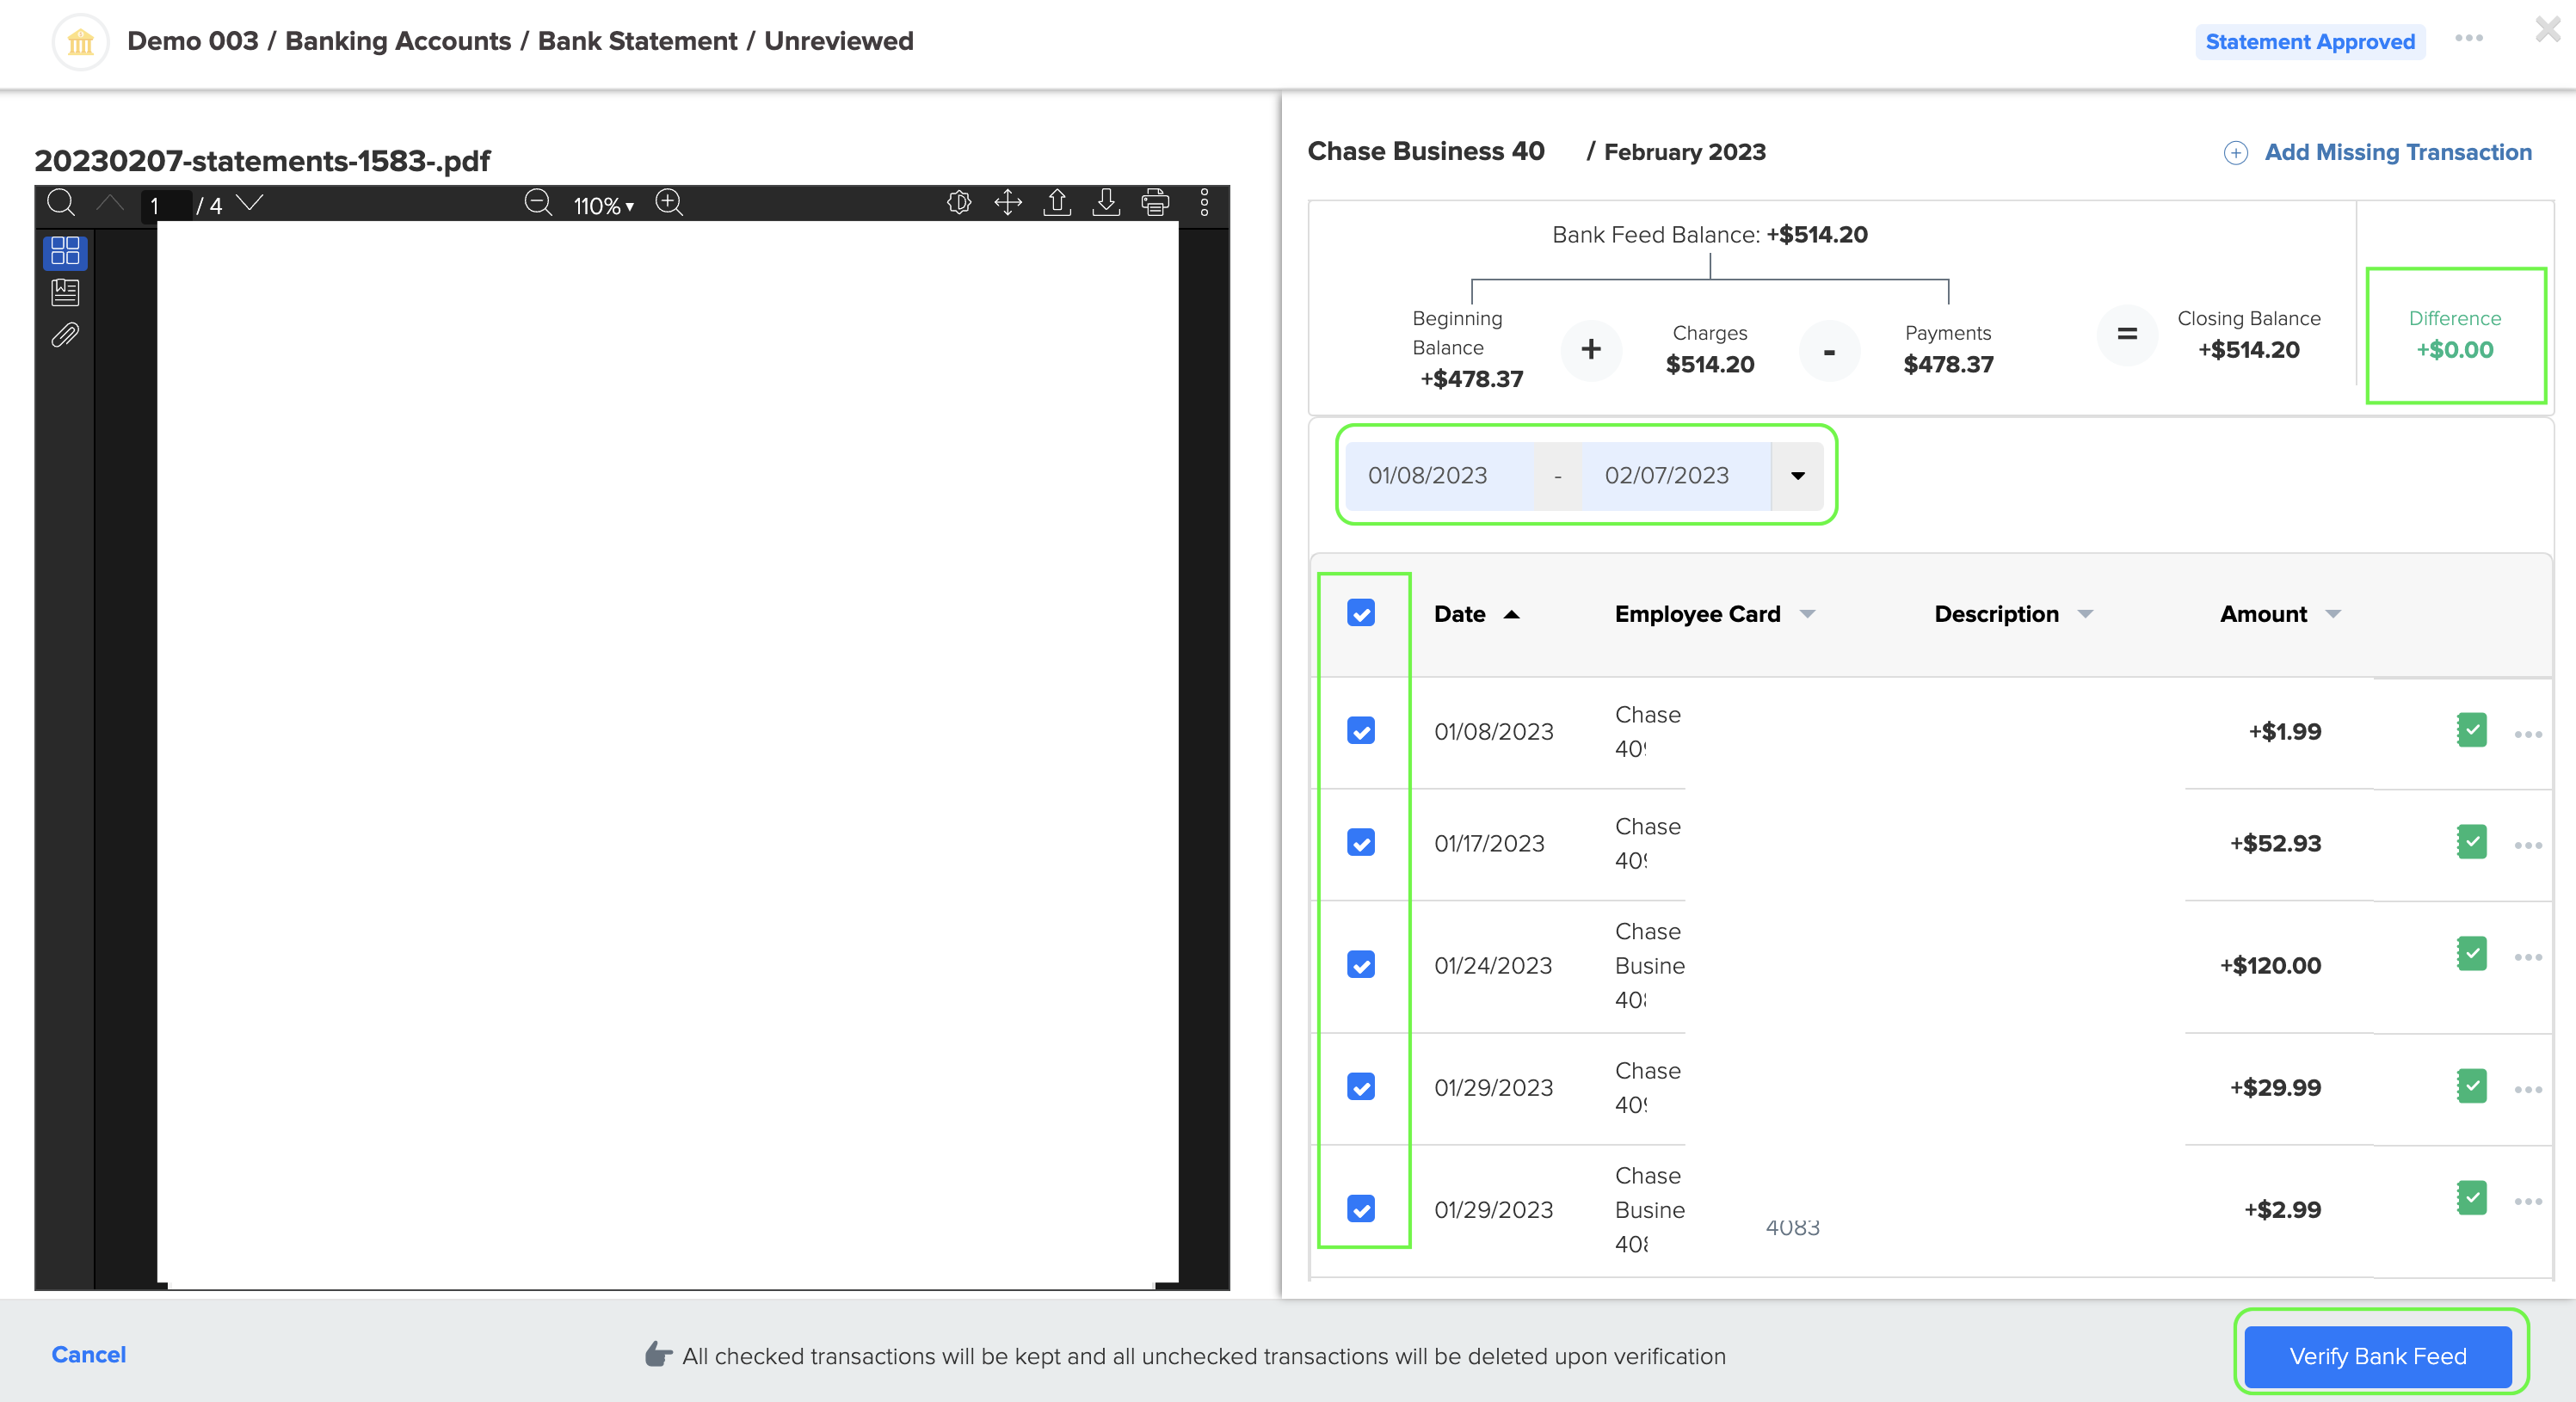
5. After you have approved the statement, the next step is to verify it by comparing all the transactions in the statement to the bank feeds. To do this, look for the 'Statement approved' icon and click on it. The 'Missing Statements' count indicates the months for which bank or credit card statements have yet to be uploaded in Docyt.
7. The bank feed has been successfully verified by comparing it to the corresponding bank statement, ensuring accuracy and reliability.
8. To 'unverify' a verified bank feed, click on the three-dot icon near the 'Statement Verified' message and select 'Unverify'.

9. A warning message will pop up. Click 'Proceed'. The verified statement status will then change to 'Statement Approved'.

10. The bank feed footer displays the following information:
Transactions from the Bank Feed: This shows the total number of transactions retrieved from the bank feed.
Selected Transactions: This indicates the number of transactions that have been checkmarked.
11. If the transactions in the bank feed do not match the transactions in the statement and some transactions are missing in Docyt, you can follow the instructions below to add the missing transactions:
- Click the 'Add Missing Transaction' link to add any missing transactions.

- At the bottom, a new window will appear where you can enter transaction details such as the date, banking account, description, type, and amount. You can add multiple transactions by clicking on 'Add another transaction'. To add the transactions, click on the 'Add' button.

To perform bank feed verification, users must have 'Admin' permission in the 'Banking Accounts' module in Docyt. Admin permission grants users access and privileges to review and verify bank statements accurately and effectively.