Accruing Expenses: How Can I Track and Manage Prepaid Invoices Over Time in Docyt?
Accurately accruing expenses for invoices spanning multiple periods can streamline your financial management. Docyt offers a robust accrual functionality to track and manage such expenses seamlessly.
-
Log into Docyt:
- Access Docyt either through the web app by logging into https://app.docyt.com/.
-
Access the Invoice Queue in Docyt's Expense Management module:
To access your invoices in Docyt's Expense Management module, follow these steps:
a. Click on 'Expense Management' in the top header menu.
b. From the dropdown menu, choose 'Accounts Payable'.
c. Select 'Invoice Queue' to access all your invoices in one place.

- Identify the invoice that requires accrual, ensuring it is in the "In Verification" status.
- Select the invoice by clicking on it.
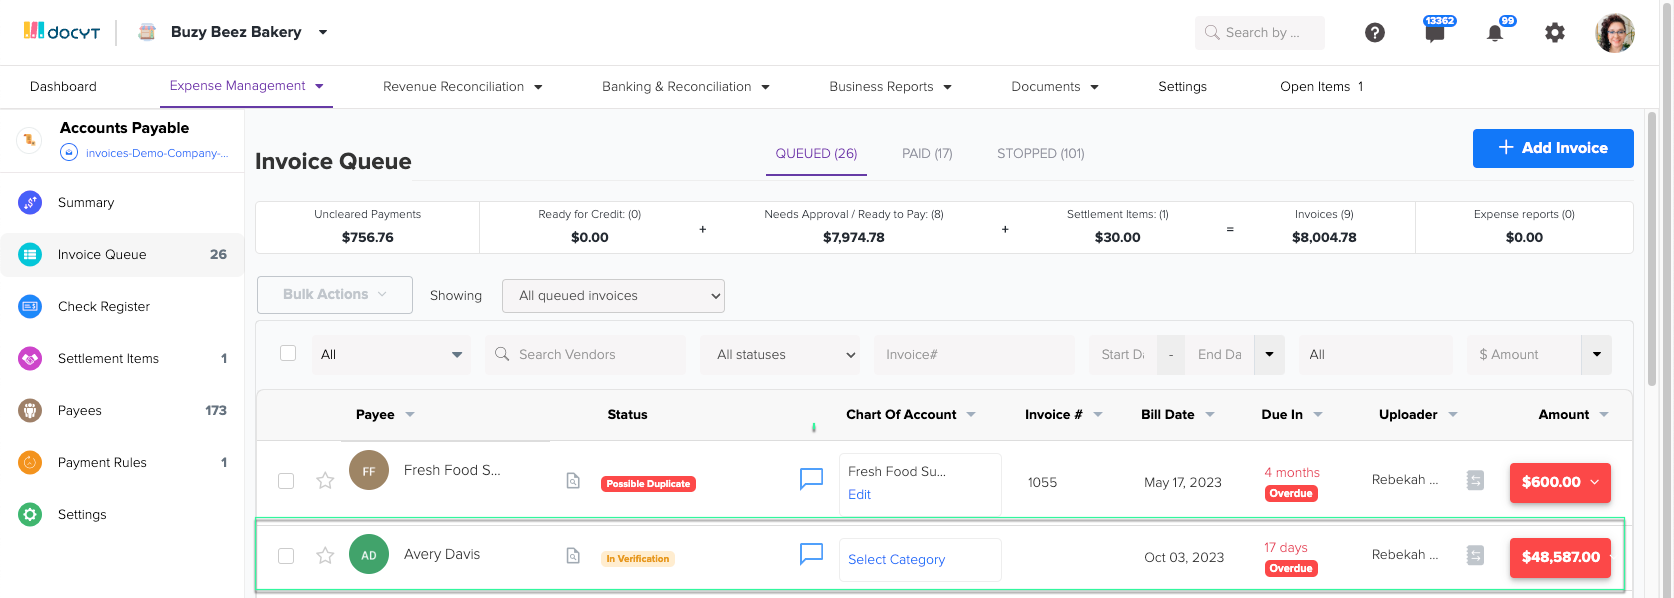
- The data window will appear on the right side of your screen.
-
Initiate the Accrual Process:
- Click the blue "Accrue" hyperlink in the Data window on the right side of your screen.

- Click the blue "Accrue" hyperlink in the Data window on the right side of your screen.
-
- The "Accrue Invoice" panel will appear on the right side of your screen.
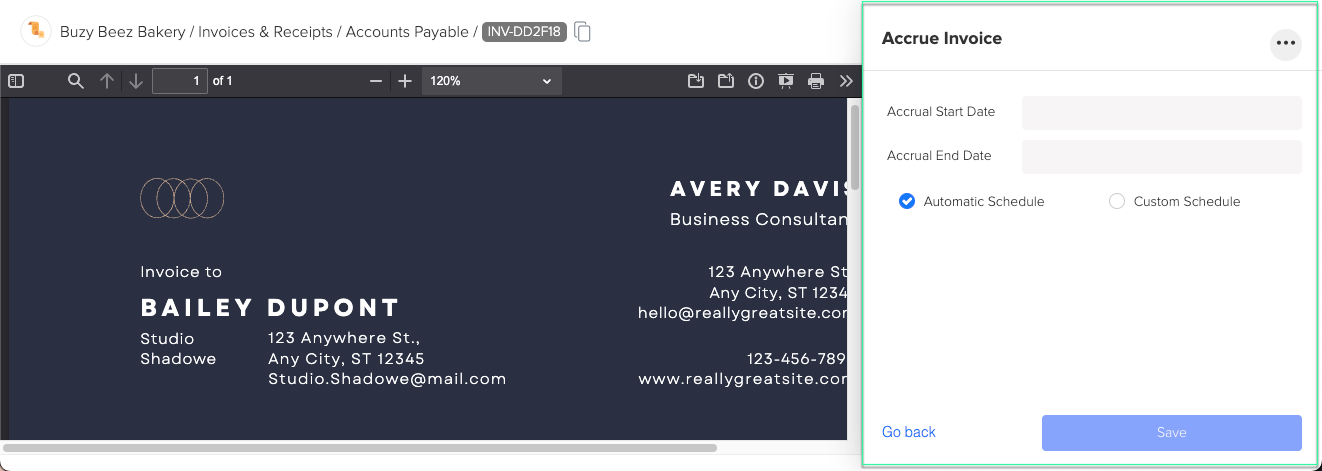
- The "Accrue Invoice" panel will appear on the right side of your screen.
-
Specify Accrual Dates:
- Input the "Accrual Start Date" and "Accrual End Date" for the selected invoice.
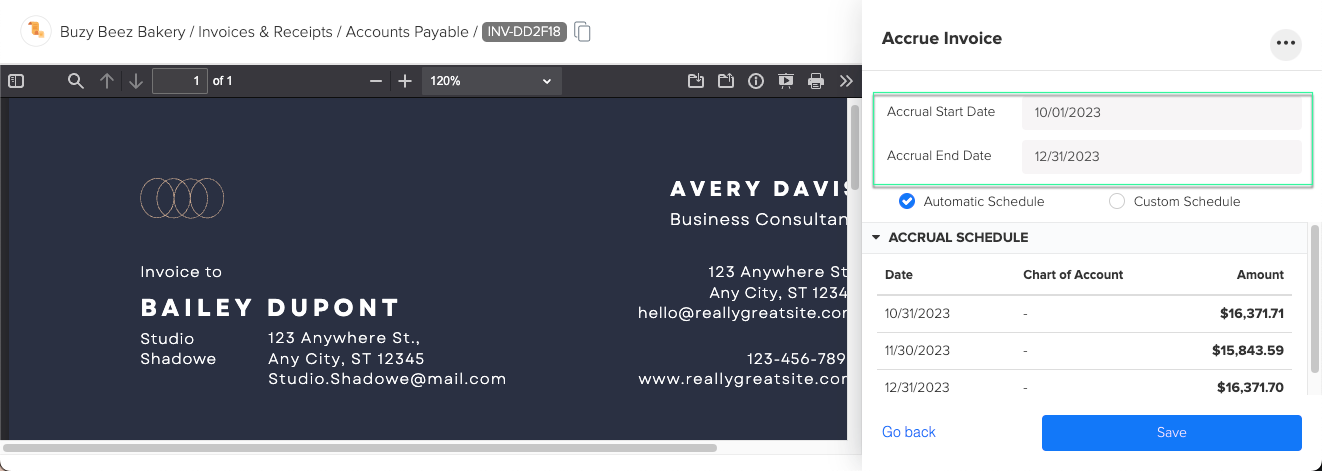
- Input the "Accrual Start Date" and "Accrual End Date" for the selected invoice.
-
Choose an Accrual Schedule:
- Automatic Schedule: Docyt will auto-calculate accrual amounts based on your provided dates.
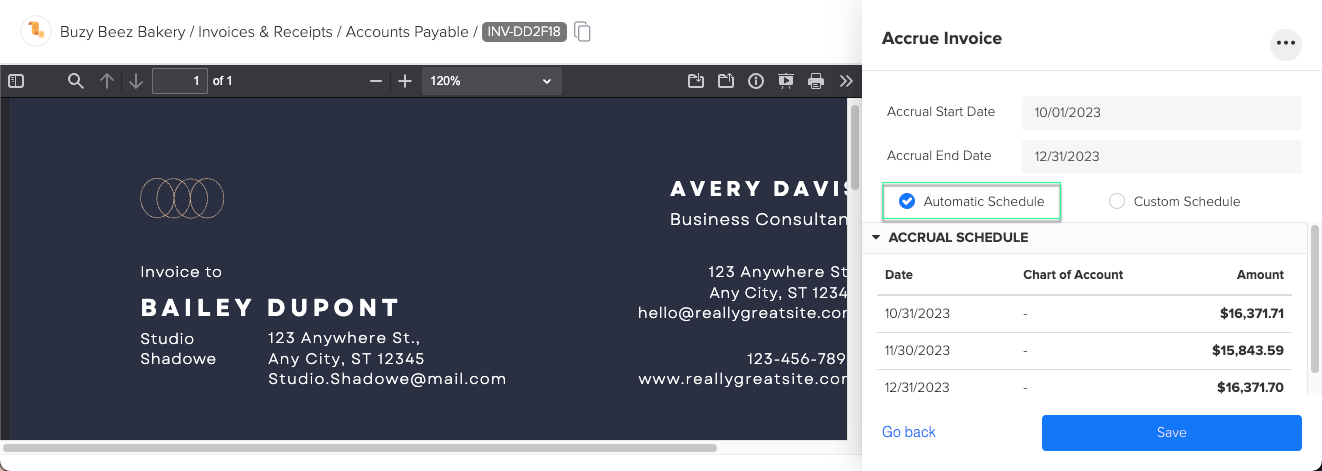
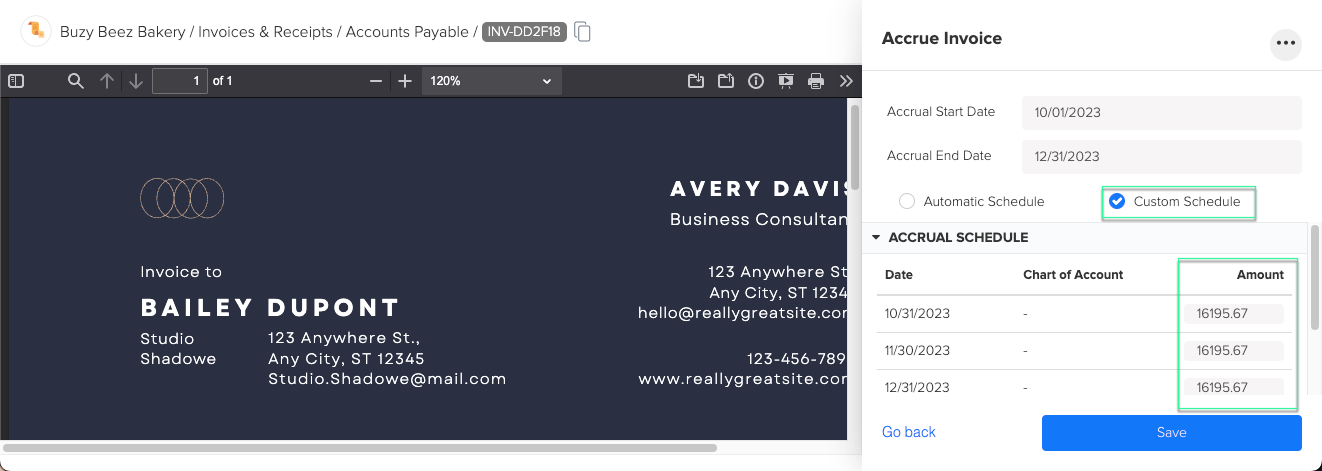
- Custom Schedule: Manually define the amounts for each accrual period.
- Click on "Custom Schedule."
- Set specific dates and amounts for each period.
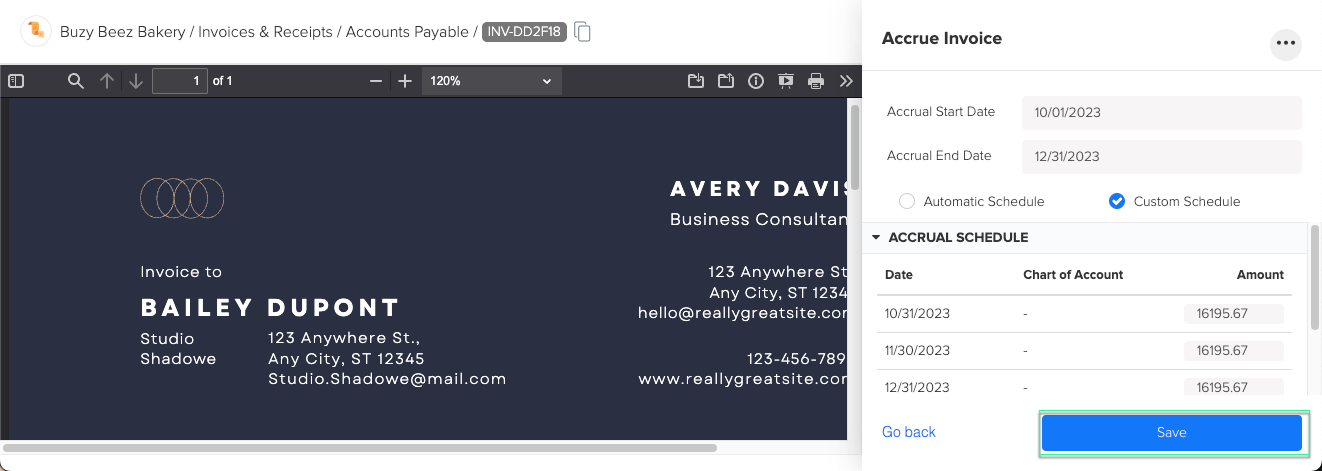
- Click "Save" to finalize the accrual settings.
- Automatic Schedule: Docyt will auto-calculate accrual amounts based on your provided dates.
- Save your changes by clicking the "Save" button when you have finished.
Tips and Warnings:
- The custom schedule option grants more control over journal entry amounts for every accrual interval. You can tailor accruals according to your business's specific needs.
FAQs:
- What happens after verifying a bill in Docyt?
- Approval Step: The verified bill undergoes review and approval for businesses with an approver in their workflow. Approvers can approve or reject the bill.
- Ready to Pay: Bills without assigned approvers or those approved will enter the "Ready to Pay" status, indicating they're prepared for payment. Ensure payments align with your business's protocols.
Docyt Subscription Requirement: This feature is available in the following Docyt subscriptions.
- Expense Management Back Office
- Insight Plan w/ Expense Management
- Impact
- Advanced
Please refer to our Docyt Pricing page for a detailed breakdown of features across different subscription tiers.